
To make polymer clay earrings, condition a small piece of clay, roll or press it flat, cut your earring shapes, and bake on a tile at your brand’s stated temperature for 30 to 45 minutes. Once cool, sand lightly, seal if desired, and attach earring posts with jewellery glue. Total hands-on time is about 30 minutes.
Polymer clay earrings are one of the quickest ways to go from raw material to finished jewellery. The clay stays workable until it goes into the oven, so you can take your time shaping and adjusting before committing to a bake. A first pair typically takes under an hour of active work, and once you have the basics, you can produce a full batch in an afternoon.
This guide walks through every step for complete beginners. No previous jewellery-making experience is required. If you have made anything with air dry clay before, the shaping skills transfer directly – the key difference is that polymer clay is baked rather than air-cured.
Materials
- 30-40 g polymer clay in your chosen colour
- Earring posts and butterfly backs
- Jewellery-grade adhesive (E6000 or two-part epoxy)
- Wet-dry sandpaper, 400-grit and 800-grit
- Optional: liquid polymer clay for a sealed finish
Tools
- Smooth ceramic tile, for rolling and baking on
- Small acrylic roller or dedicated pasta machine
- Clay cutters or sharp craft knife
- Flexible palette knife for lifting shapes
- Oven thermometer
- Baking paper
Is polymer clay good for making earrings?
Yes – polymer clay is one of the most practical materials for handmade earrings. It is lightweight, holds fine detail, and produces a durable result once baked. A finished pair weighs almost nothing, which makes it comfortable for all-day wear. The colour range is large, and clays from different brands can be blended to create custom shades.
Compared to metal or resin, polymer clay has a very low barrier to entry. You do not need a kiln, specialist ventilation, or expensive equipment – a standard home oven and a few basic tools cover everything. Browse the polymer clay tutorials section for more projects that use the same core technique.
One thing to be aware of: polymer clay is not suitable for items that will hold food or be submerged in water for extended periods without a protective coat. For earrings used as jewellery, this is rarely a concern.
What tools do you need for polymer clay earrings?
The tools listed above are sufficient for a first pair. The single most important item is an oven thermometer. Home ovens routinely run 25-50°F off their dial and cycle above the set temperature once they reach it, and the two most common beginner failures – underbaked flexible pieces and scorched discolouration – both trace back to that gap between the dial and the true temperature inside. A ceramic tile serves double duty as your rolling surface and your baking platform, keeping the earring backs flat during the cure.
Cutters give the cleanest results for geometric shapes. For organic or freehand forms, a sharp craft knife gives you more flexibility. Start with one or two simple cutter shapes before attempting freehand work.
What temperature do you bake polymer clay at?
There is no single correct number for “polymer clay” – bake temperature depends entirely on the brand, and using the wrong one can leave pieces brittle or scorched. Always read your own packet, since formulas and recommended temperatures do change between batches and product lines.
| Brand | Bake temperature |
|---|---|
| Sculpey Premo / Souffle | 275F / 135C |
| FIMO | 230F / 110C |
| Cernit | 266-275F / 130-135C |
| Kato Polyclay | 300F / 150C |
Whatever brand you use, never exceed its stated temperature. Overheated polymer clay releases irritating fumes, so bake in a well-ventilated room.
How do you make polymer clay earrings step by step?
Total time: about 90 minutes
1Condition the clay
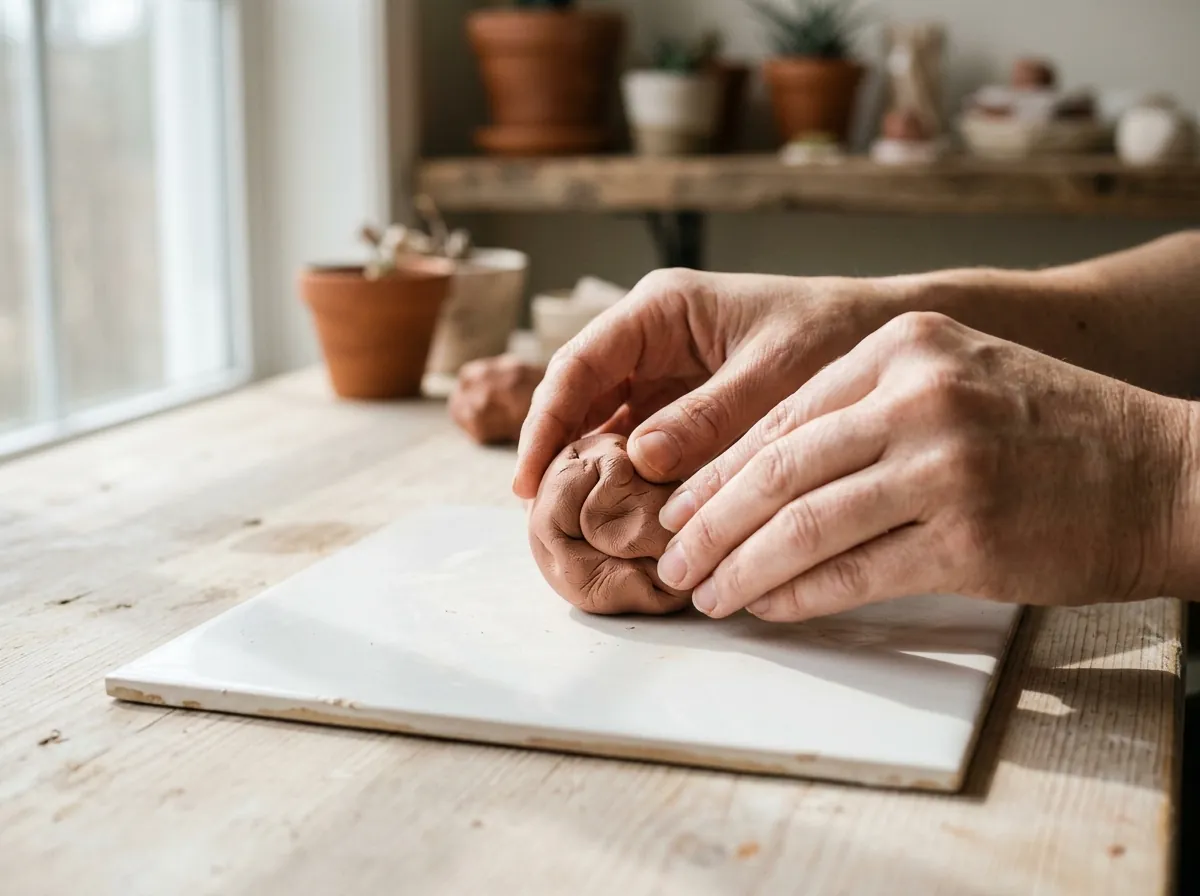
Tear off 30 to 40 g of clay – roughly the size of a walnut – and work it in your hands for two to three minutes until it is warm and smooth. Polymer clay firms up when cold and can crumble if rolled straight from the packet. Aim for a consistency that holds its shape without cracking at the edges. If the clay feels stiff after three minutes, warm your hands under hot water, dry them, and continue conditioning. If it becomes sticky, rest it on the tile for five minutes before rolling.
2Roll to an even thickness
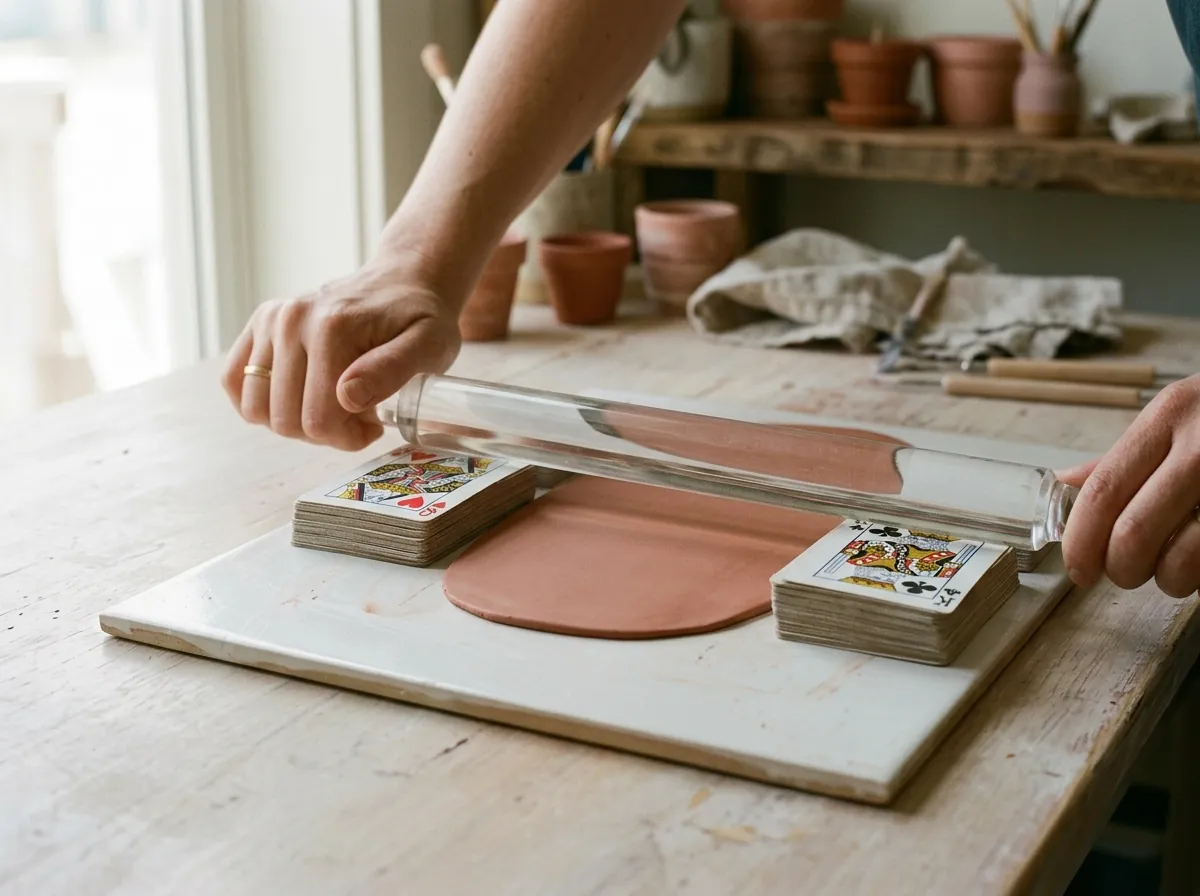
Place the conditioned clay on your ceramic tile and roll it flat with an acrylic roller. For most earring styles, 3 to 4 mm is a practical starting thickness – light enough to be comfortable on the ear, solid enough not to snap at thin points. Roll in one direction, rotate a quarter-turn, and repeat to keep the sheet even. Two playing cards stacked on each side of the clay give a reliable thickness guide without measuring.
3Cut the earring shapes
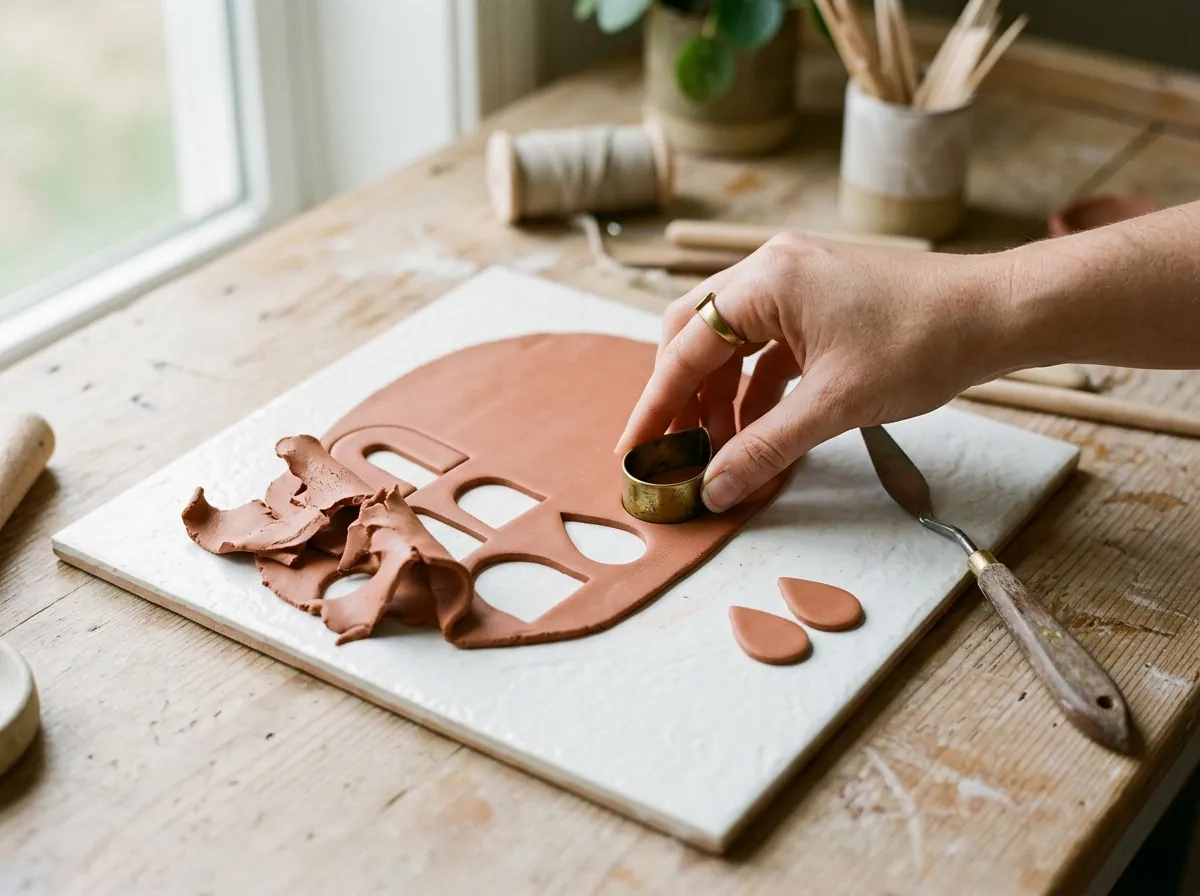
Press your cutter straight down into the sheet and lift cleanly – do not twist the cutter, as this distorts the edge. If using a knife, cut with one smooth stroke rather than a sawing motion. Peel away the surrounding clay and gently lift each shape with a flexible palette knife or a dampened fingertip. Return each piece to the tile and smooth any rough edges with a fingertip. Leave matching pairs side by side so you can confirm they are the same size before baking.
4Bake on the tile
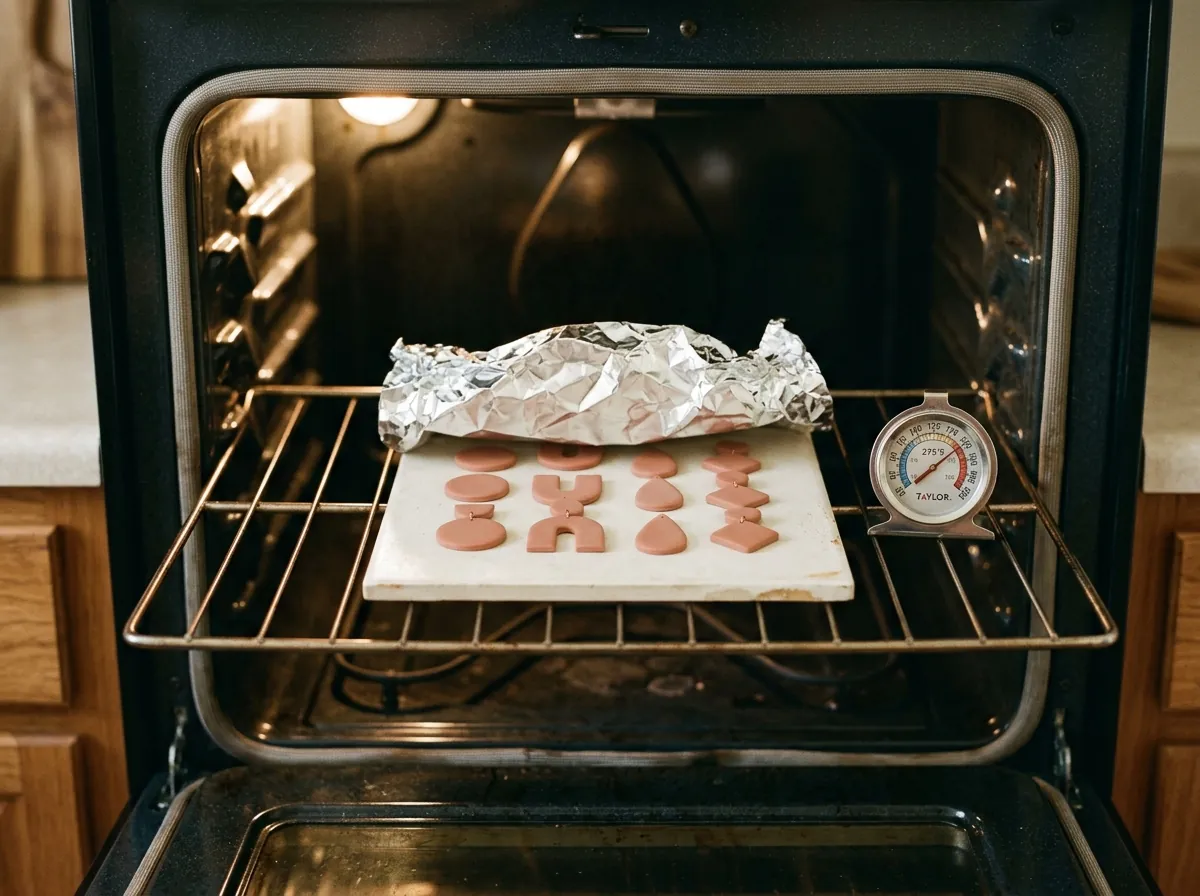
Preheat your oven to the temperature stated on your clay’s packet – see the brand temperature table above, since polymer clay brands cure at different temperatures. Verify the actual temperature with your oven thermometer before loading. Place the tile with the earring shapes on the centre rack. Lay a loose tent of foil over the pieces – this prevents scorching and the darkening that extended heat causes in white and translucent clays, without slowing the cure. Bake for 30-45 minutes for earrings in the 3-4 mm range; many experienced makers bake 45-60 minutes at the correct temperature for maximum strength, since under-baking – not baking time – is the main cause of brittle, snap-prone pieces. Never exceed your brand’s stated temperature: overheated polymer clay releases irritating fumes, so keep the room ventilated while baking. Do not open the oven during baking. When the time is up, turn off the heat and leave the door closed for five minutes. The pieces will feel slightly soft when first removed – this is normal, since polymer clay stays flexible while hot and only becomes rigid once fully cool. Leave the pieces to cool for 20-30 minutes and do not test their strength until they are completely cold.
5Sand, seal, and attach posts
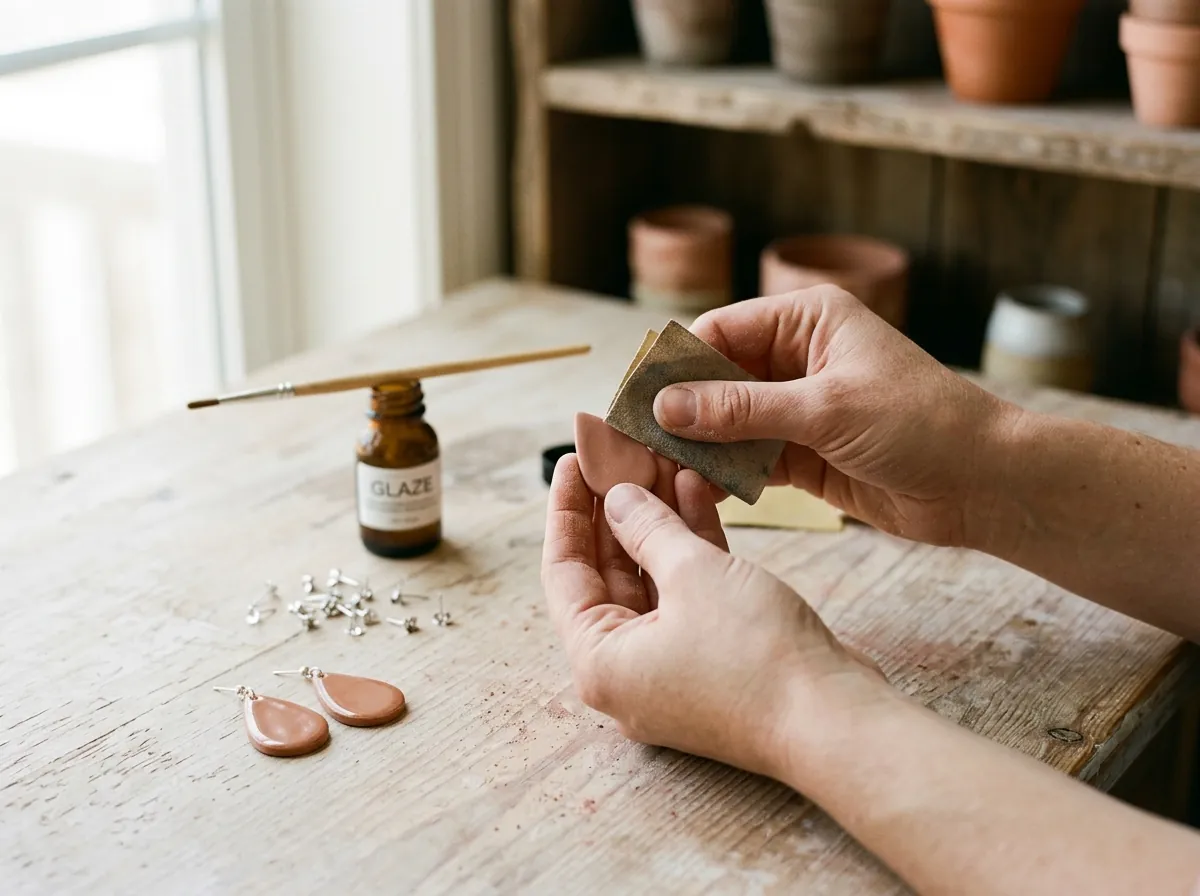
Once fully cool, sand each piece with 400-grit paper using light circular strokes, then move to 800-grit for a smooth finish. Wipe away the dust with a barely-damp cloth. For added protection and shine, apply a thin coat of Sculpey Gloss Glaze and let it dry flat for 1-2 hours until touch-dry, then leave it to cure fully for 24 hours before wearing. Finally, apply a small dot of jewellery-grade adhesive to the earring post, press firmly to the back of each piece, and leave lying flat for 24 hours before wearing or packaging.
Keep the finished earrings away from prolonged direct sunlight when not in use – UV exposure can fade some clay colours over time. Store in a small box or jewellery pouch to protect the posts from being knocked loose.
For a complementary beginner project that uses many of the same shaping and finishing skills, see our air dry clay trinket dish guide.
If it goes wrong
| Problem | Likely cause | How to fix it |
|---|---|---|
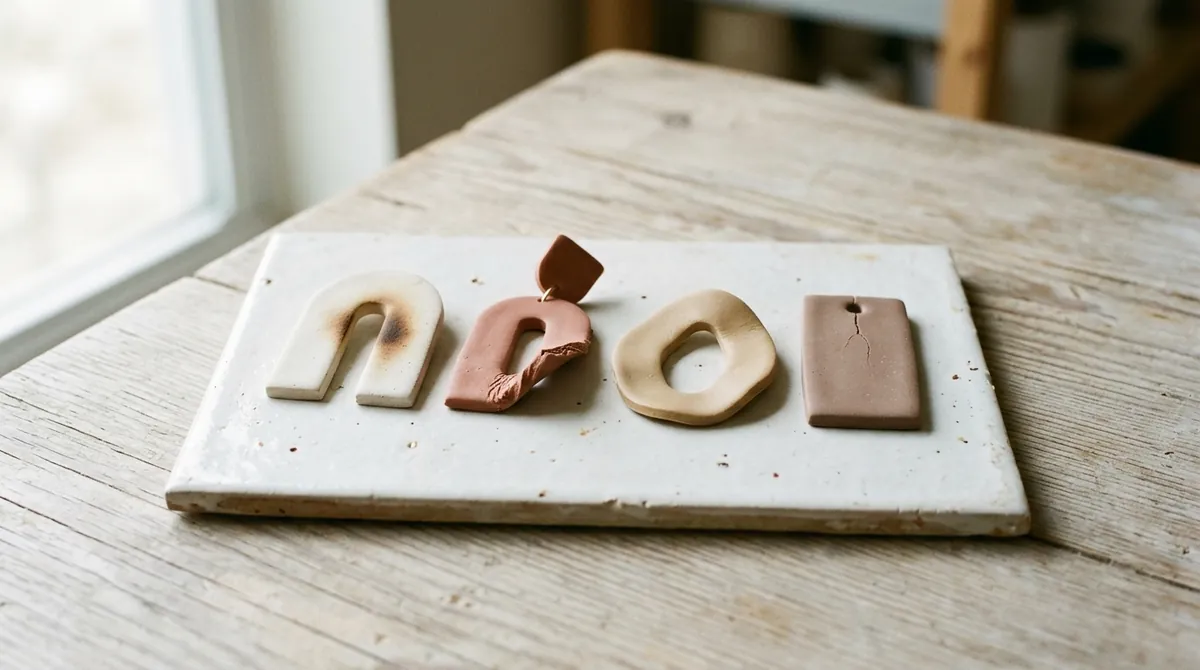
| Earrings are flexible or rubbery after baking | Underbaked – either the temperature was too low or the bake time was too short | Verify oven temperature with a separate thermometer and return the pieces for a second full bake at the correct temperature. |
| Surface is scorched or discoloured | Oven running hotter than the dial shows, or pieces placed too close to the heating element | Use an oven thermometer to confirm the real temperature, tent the tile loosely with foil, and always bake on the centre rack. |
| Posts come off after a day of wearing | Wrong adhesive, insufficient curing time, or post applied to an unsanded surface | Sand the back of each piece before gluing. Use jewellery-grade E6000 or a two-part epoxy and leave flat for a full 24 hours before handling. |
Can polymer clay earrings get wet?
Baked polymer clay is water-resistant but not fully waterproof. Brief contact with water – washing your hands while wearing the earrings – will not cause damage. Prolonged submersion can weaken the adhesive joint over time and may affect painted or sanded surfaces.
The simplest protection is a coat of jewellery-grade resin or a dedicated polymer clay varnish applied after baking and sanding. This adds a hard, water-resistant layer and also deepens the colour. Avoid standard nail varnish – it can react with the clay and become tacky over months.
Frequently asked questions
What is the best polymer clay brand for earrings?
There is no single best brand – Premo/Souffle, FIMO, Cernit, and Kato Polyclay all work well for earrings, and each bakes at a different temperature, so check the brand temperature table above before you start. Look for a clay rated as strong after baking rather than soft-formula clays designed for sculpting. Strength matters most for thin shapes like earrings where weak points can snap.
Do polymer clay earrings need to be sealed?
Sealing is optional but recommended. A thin coat of resin or jewellery-grade varnish protects the surface, adds shine, and improves water resistance. Avoid nail varnish – it can react with the clay and become sticky over time.
How thick should polymer clay earrings be?
For most stud and drop styles, 3-4 mm is a practical working thickness – light enough to wear all day and thick enough not to snap at narrow points. Very fine or delicate shapes may need reinforcing at the weakest area.