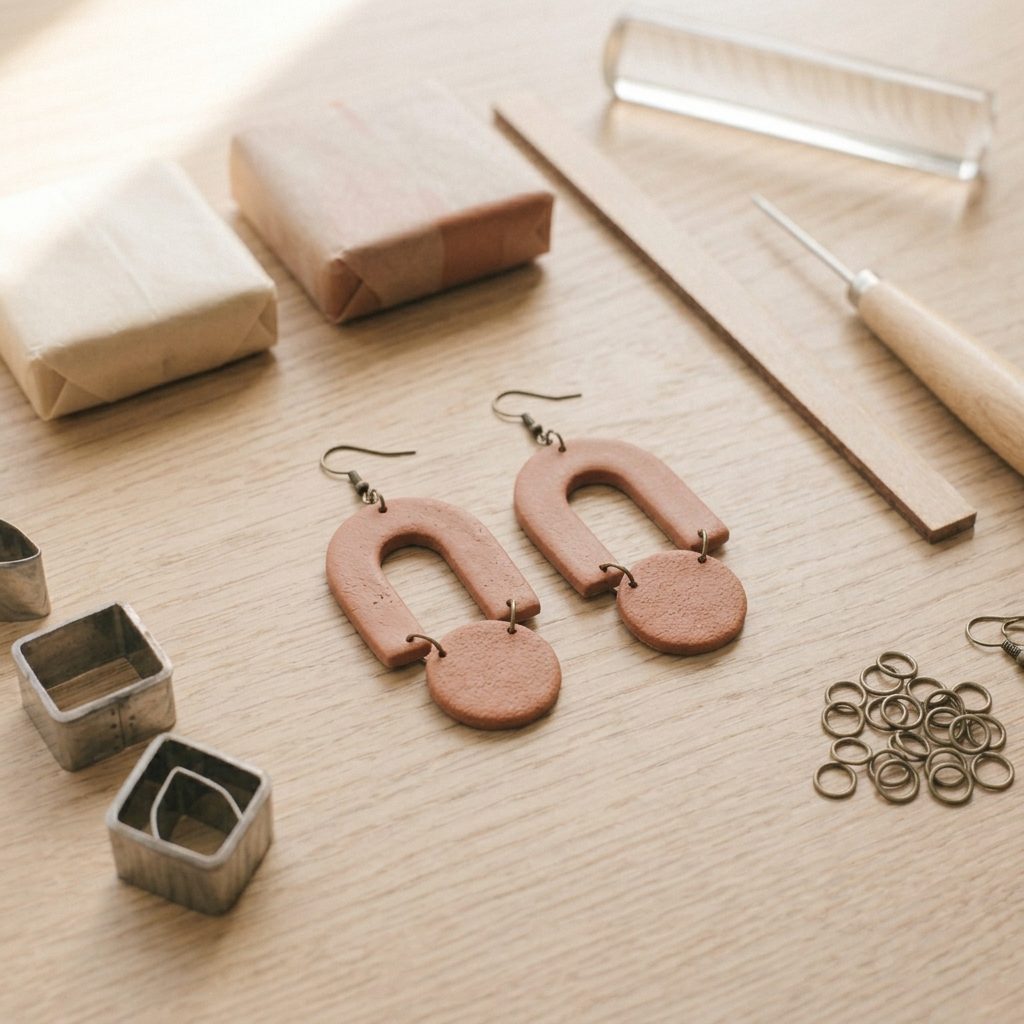
Polymer clay dangle earrings fail in two places: the clay warps and the jump rings distort. Cut matched pairs from a 3mm sheet, punch the holes before baking, bake flat between two tiles, then open every ring sideways with two pairs of pliers.
Polymer clay dangle earrings are two flat shapes and a chain of small metal parts, and both halves have their own way of going wrong. The clay warps if it is baked loose, and the jump rings pull open if they are twisted apart instead of opened sideways.
Neither problem is difficult once you know it exists. Bake the pieces flat under a second tile, and open every ring by moving one end towards you rather than pulling it apart.
The clay jewellery hub covers the other pieces that use the same findings.
Materials
- Polymer clay in one or two muted colours
- Small jump rings
- A pair of ear wires
- Plain baking parchment
Tools
- Clear acrylic roller
- Two guide strips about 3mm thick
- Two small cutters about 20mm across
- Needle tool
- Two white ceramic tiles
- Two pairs of flat nose pliers
- Oven thermometer
- Fine wet and dry sandpaper
Thirty minutes of work, half an hour of baking, and ten minutes of assembly.
How do you make polymer clay dangle earrings?
Roll a 3mm sheet, cut two matched pairs of shapes, punch the connecting holes before baking, bake flat between two tiles, sand the edges, then link the pieces with jump rings opened sideways.
1Set out what you need
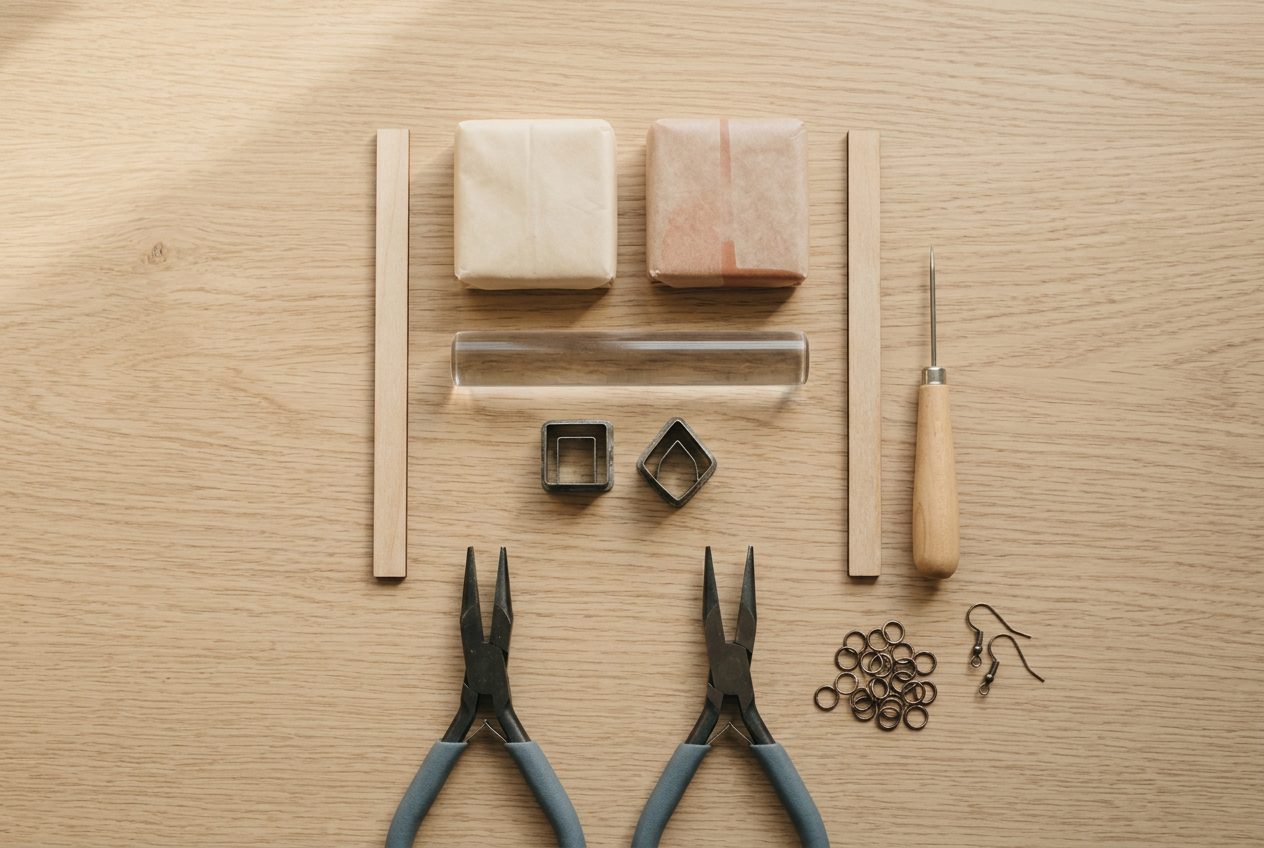
Two pairs of pliers is not optional. Opening a jump ring with one pair and a thumbnail is exactly how rings end up distorted and never close properly again.
Buy the findings before you cut the clay. Jump ring size decides how big the holes need to be, and holes cannot be enlarged after baking without chipping the edge.
2Roll a 3mm sheet and cut matched pairs
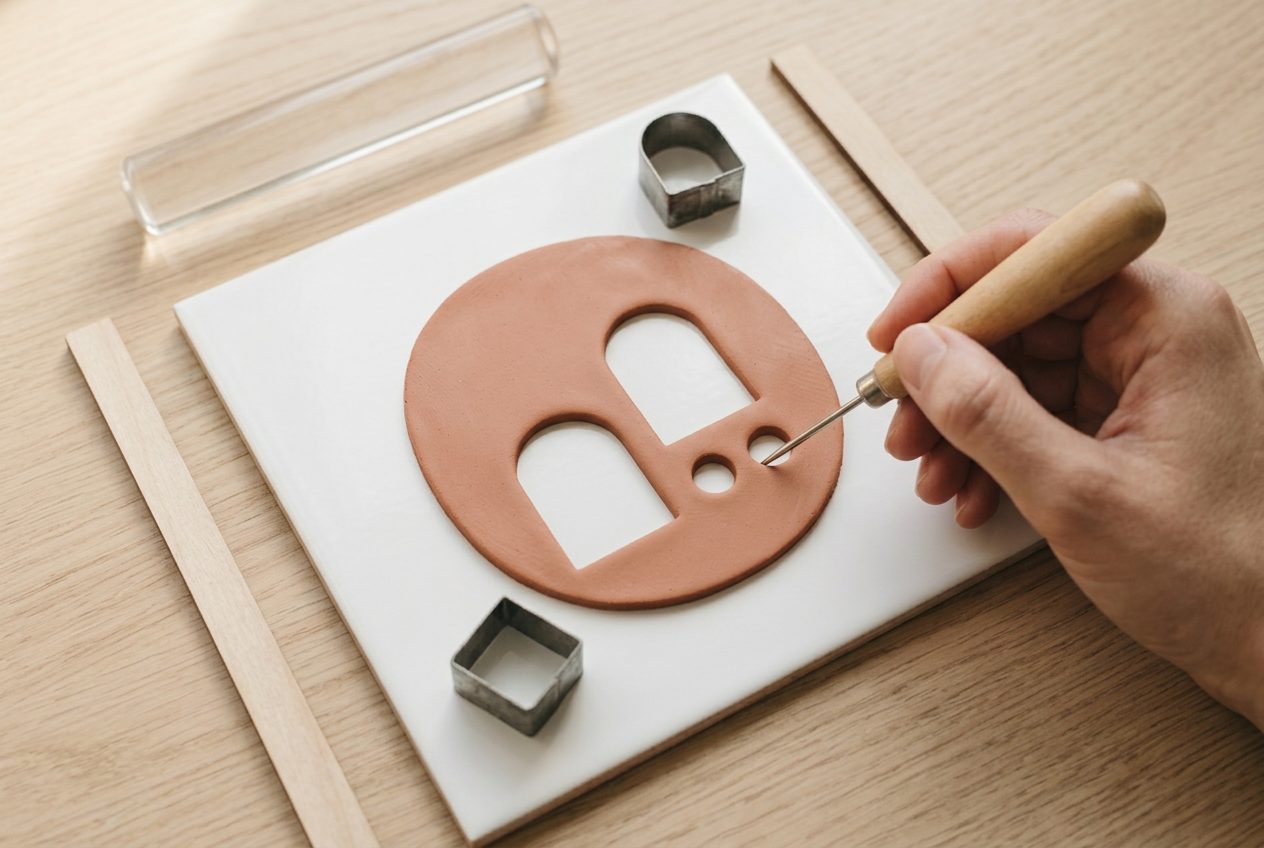
Three millimetres keeps the weight down. Earrings are worn on a piece of skin that notices every extra gram, and thick clay pieces drag at the earlobe within an hour.
Cut all four shapes from the same sheet in the same session, so the colour and thickness match exactly. Two pieces rolled separately are never quite the same shade.
Lift the waste away and leave the cut shapes untouched on the tile. Moving a soft piece is what turns a matched pair into two slightly different shapes.
3Punch the connecting holes
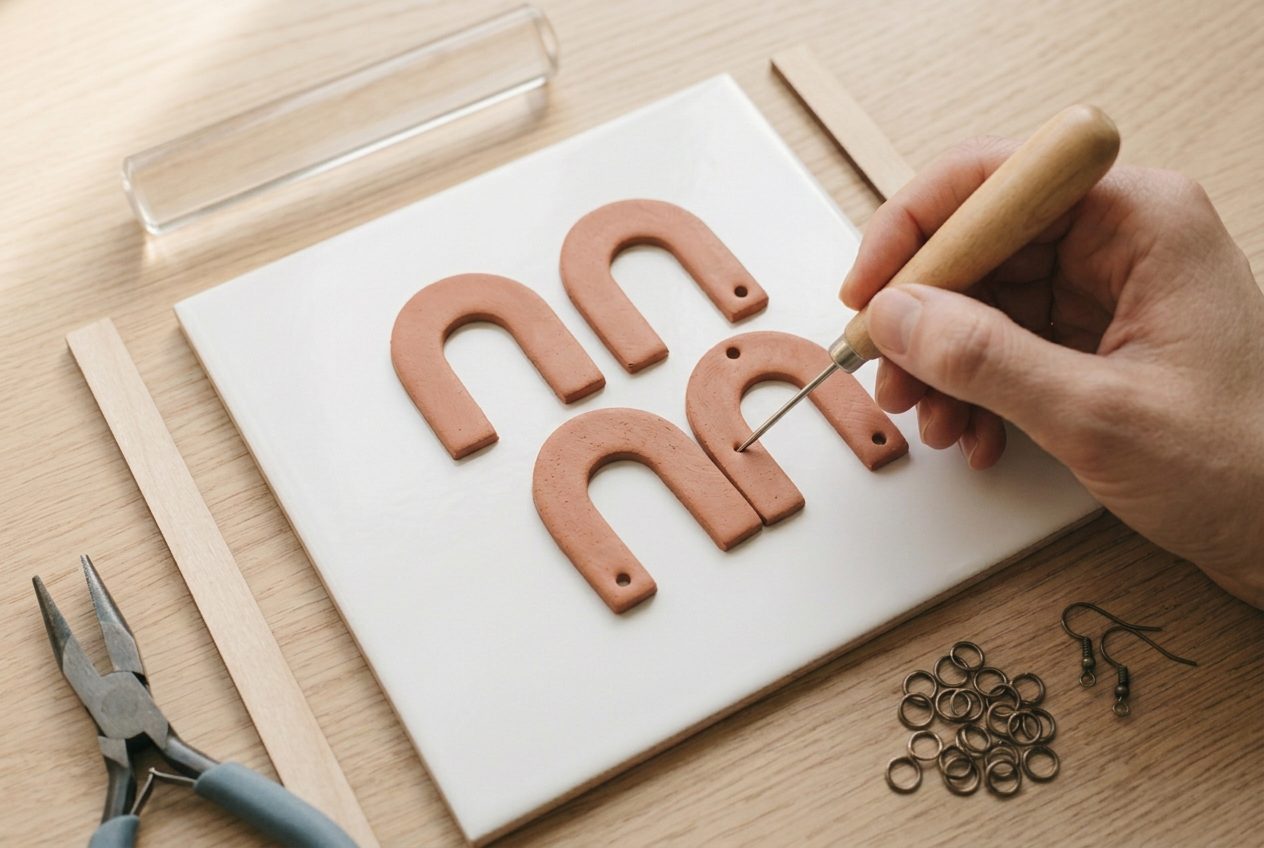
Punch every hole now. Drilling baked clay is possible but chips the face, and the chip always happens on the side that shows.
Keep each hole about 3mm in from the edge. Closer and the thin bridge of clay breaks under the pull of the ring; further in and the pieces hang with an obvious gap between them.
Punch the holes in matched positions on both pieces of a pair. Hold the two shapes side by side and mark the spot with the needle before pushing through.
4Bake flat between two tiles
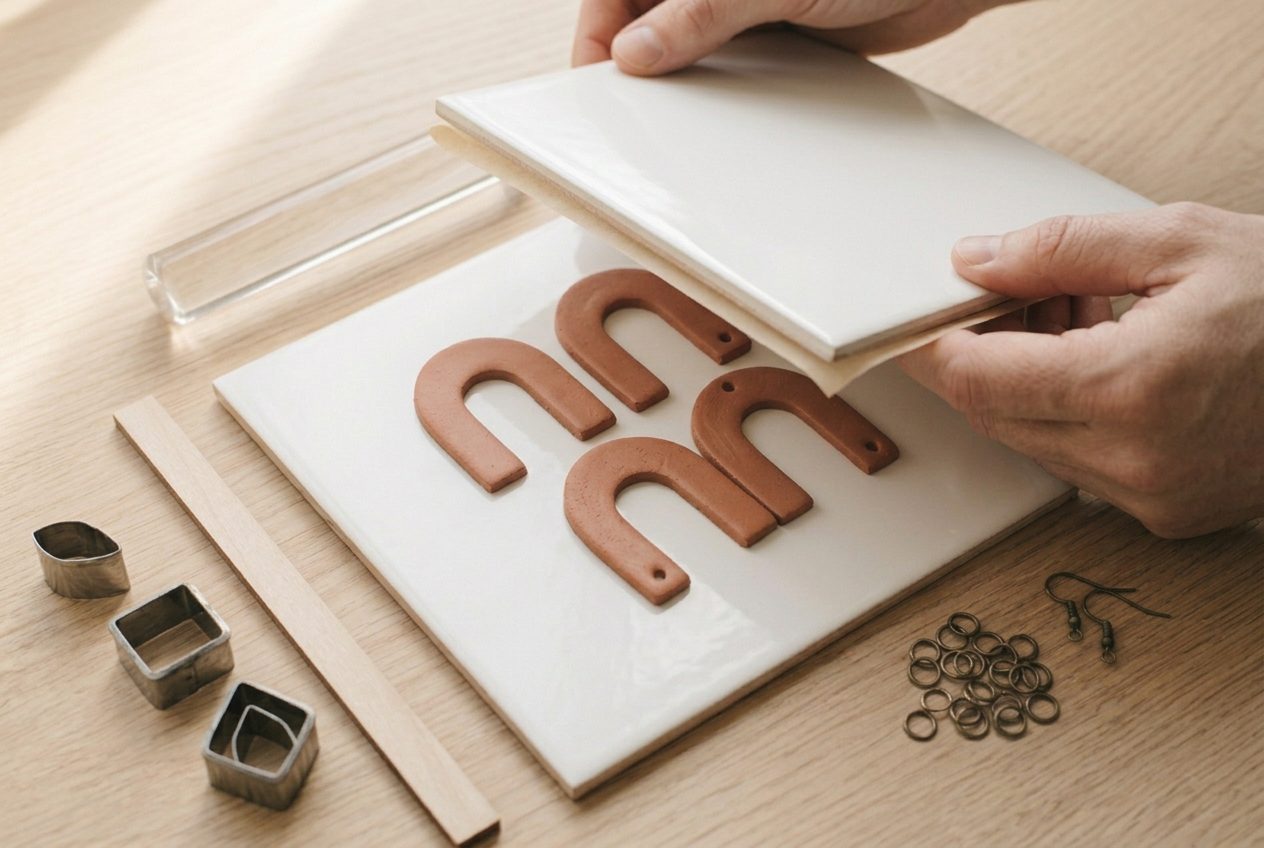
Lay parchment over the pieces and set a second tile on top. Thin flat pieces curl at the edges as they cure, and a tile above them holds them flat without pressing a texture into the surface.
Bake at 130C for thirty minutes, checked with an oven thermometer, then leave everything to cool with the oven door shut.
A weighted bake also gives a better matt face. The pieces come out with two flat sides rather than one flat and one slightly domed.
5Sand the edges
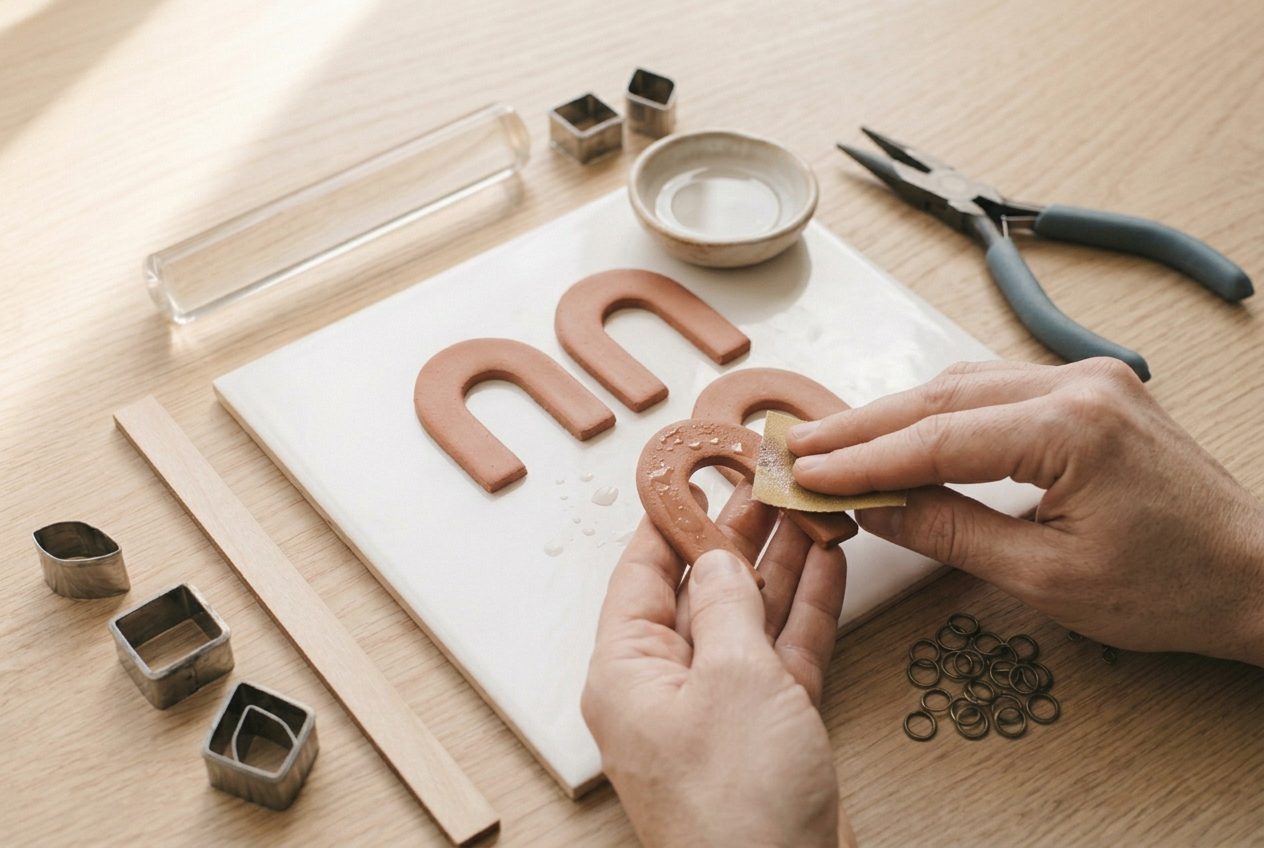
Wet sand the cut edges with fine paper until they feel smooth to a fingertip. The edge is the only part of an earring anyone gets close enough to inspect.
Sand the inside of the holes too, with a rolled scrap of paper. A rough hole wears a groove into a jump ring over time and eventually cuts through the plating.
Work wet. It takes no longer, produces no dust to breathe, and gives a softer sheen than dry paper does.
6Link them with jump rings
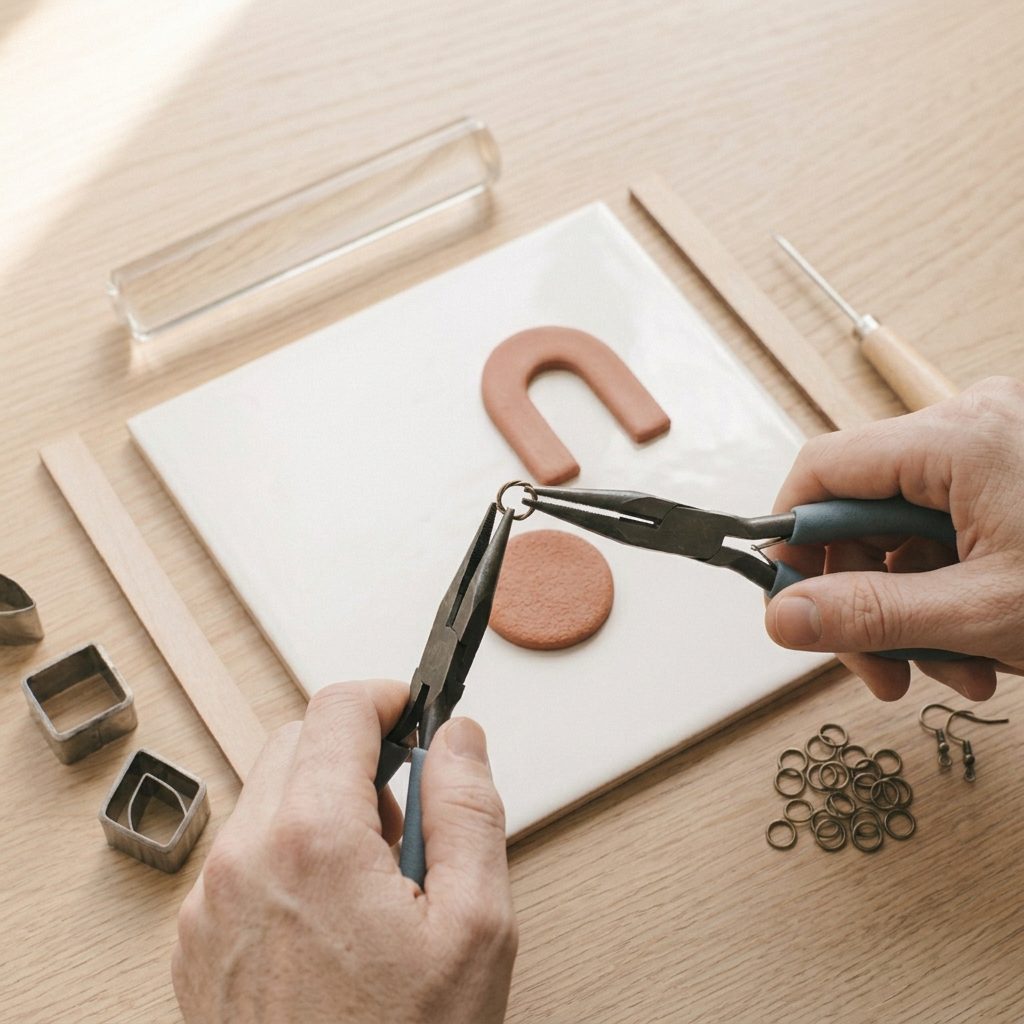
Grip the ring with a pair of pliers either side of the join and twist one hand towards you and the other away. Opening it sideways keeps the ring round; pulling the ends apart flattens it into an oval that never closes cleanly again.
Thread the two clay pieces on, then close the ring by reversing the movement until the two ends meet with no gap. Run a fingernail across the join to check.
Add the ear wire to the top ring the same way. The techniques hub covers the conditioning that keeps thin pieces from cracking, and the finishing hub covers sanding and buffing baked clay.
If it goes wrong
| Problem | Likely cause | How to fix it |
|---|---|---|
| The pieces curled up at the edges in the oven | They were baked loose on a tile, so the two faces cured and cooled at different rates | Bake between two tiles with parchment in between. A curled piece cannot be flattened after curing. |
| The jump ring will not close flush | It was opened by pulling the ends apart, which stretches the ring into an oval | Use a fresh ring and open it sideways with two pairs of pliers. A distorted ring never returns to a true circle. |
| The clay broke between the hole and the edge | The hole was punched too close to the edge, leaving a thin bridge under load | Keep about 3mm of clay between hole and edge. A break here cannot be repaired invisibly on a piece this small. |
| The two earrings do not match | The shapes were cut from different sheets, or moved while soft | Cut all four pieces from one sheet in one session and leave them untouched on the tile until they are baked. |
Why do my polymer clay earrings warp when baked?
Because a thin flat piece cures unevenly if nothing is holding it flat.
The face against the tile heats first and cures first, while the upper face is still soft. Small differences in how the two faces contract as they cool are enough to lift the edges of a 3mm piece, and once cured the curl is permanent.
Baking between two tiles with parchment in between removes the difference. Both faces are against a warm flat surface, and the pieces come out as flat as they went in.
The other cause is uneven thickness. A shape rolled thicker at one end cures at different rates along its length and bends, which no amount of weight completely fixes. Roll between guide strips.
How do you open a jump ring without ruining it?
Sideways, with two pairs of pliers, one on each side of the opening.
Twist one hand towards you and the other away, so the two ends move past each other rather than apart. The ring keeps its circle, and closing it is simply the reverse movement.
Pulling the ends apart stretches the ring into an oval. It will not close flush after that, the join leaves a gap, and an earring will eventually work its way off it.
Close every ring until the two ends touch with no visible gap and no step between them. If the ends do not meet, take it off and use a fresh ring rather than persuading a spoiled one. The troubleshooting hub covers the other failures that show up after a few weeks of wear.
Frequently asked questions
Why do polymer clay earrings warp in the oven?
A thin piece baked loose cures unevenly between its two faces and the edges lift. Baking under a second tile with parchment between holds them flat.
How do you open a jump ring properly?
Hold it either side of the opening with two pairs of pliers and twist one hand towards you, one away. Pulling the ends apart flattens the ring permanently.
How thick should clay earrings be?
About 3mm. Thicker pieces are heavy enough to drag at the earlobe within an hour, and thinner ones break at the hole.
Can you drill holes in polymer clay after baking?
You can, with a hand drill and light pressure, but it chips the face as the bit breaks through. Punching the holes before baking is far cleaner.