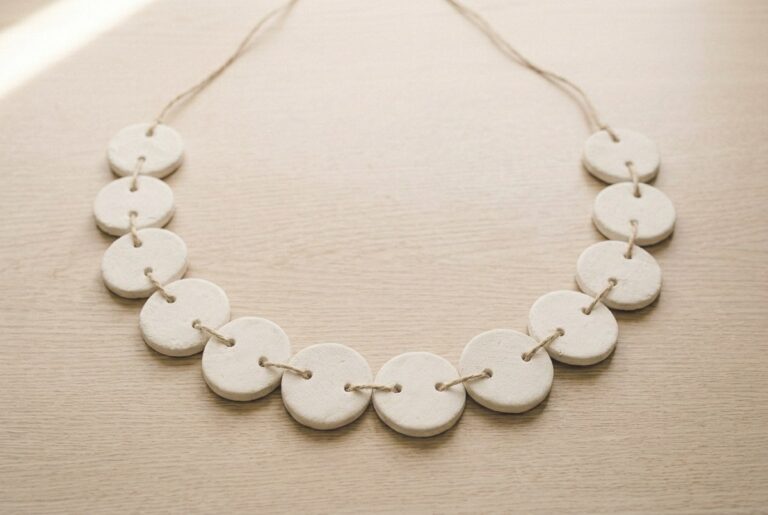
Polymer clay christmas ornaments keep their shape for decades if they are baked flat. Cut 6cm shapes from a 4mm sheet, punch the hanging hole 5mm in from the edge, press a real sprig into the face, then bake between two tiles at 130C.
Polymer clay christmas ornaments are the version that survives being put away in a box each January and taken out again for a decade. Salt dough goes soft in a damp loft and air dry clay chips; baked polymer clay does neither.
What it does do is warp, if a thin flat shape is baked loose on a tray. Bake between two tiles and the pieces come out as flat as they went in.
The christmas hub has the salt dough and air dry versions for comparison.
Materials
- Polymer clay in two muted colours
- Natural twine
- Plain baking parchment
- A sprig of real greenery
Tools
- Clear acrylic roller
- Two guide strips about 4mm thick
- Metal cutters about 6cm across
- A plain drinking straw
- Two white ceramic tiles
- Oven thermometer
- Fine wet and dry sandpaper
Thirty minutes for a set of six, then half an hour in the oven.
How do you make polymer clay christmas ornaments?
Roll an even 4mm sheet, cut the shapes, punch a hanging hole 5mm in from the edge, press a texture or an inlay into the face, bake flat between two tiles at 130C, then sand the edges and thread the twine.
1Set out what you need
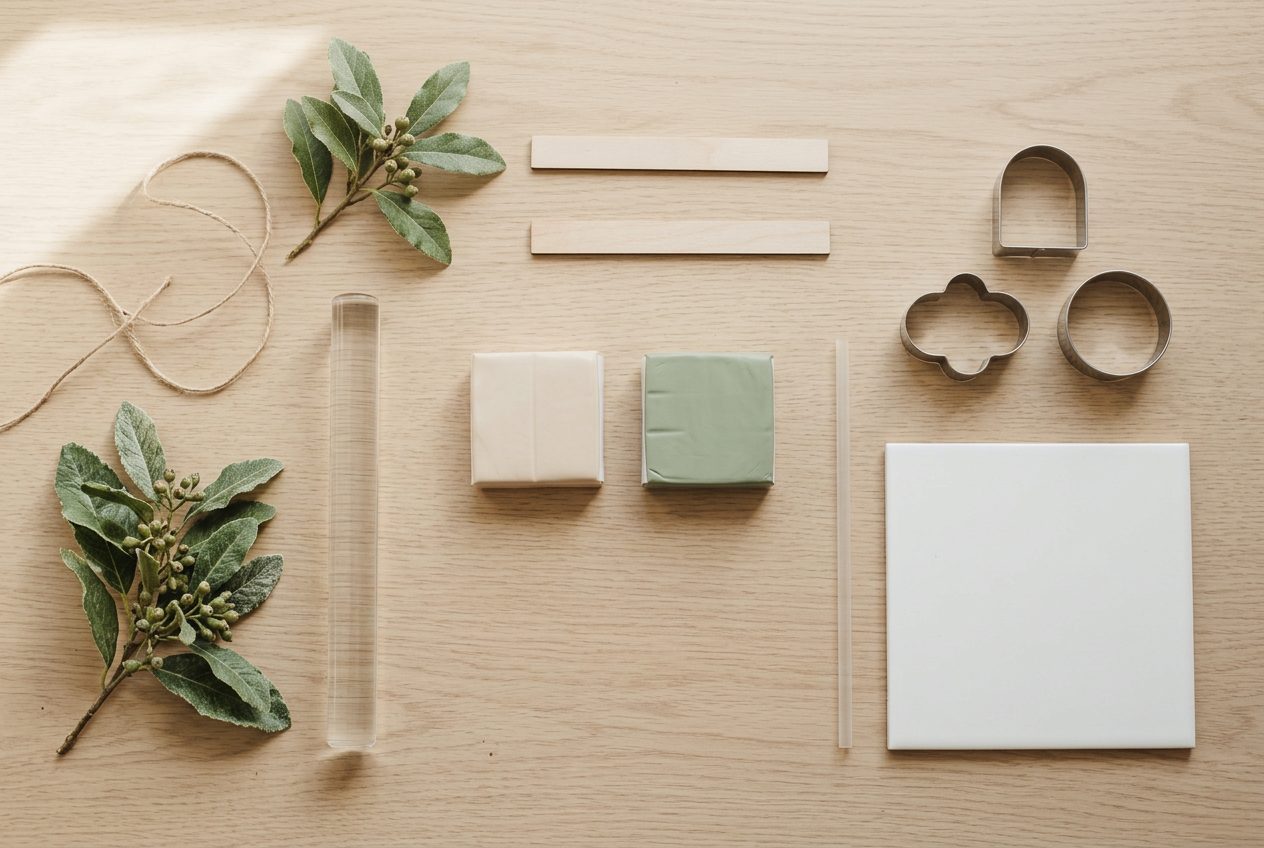
Muted colours age better than bright ones. A tree hung with cream, sage and terracotta looks considered in a way that primary red and green rarely manages.
The sprig of greenery is a texture tool, not decoration. Pressed into soft clay it leaves a far better impression than any bought stamp of a leaf.
2Roll an even 4mm sheet
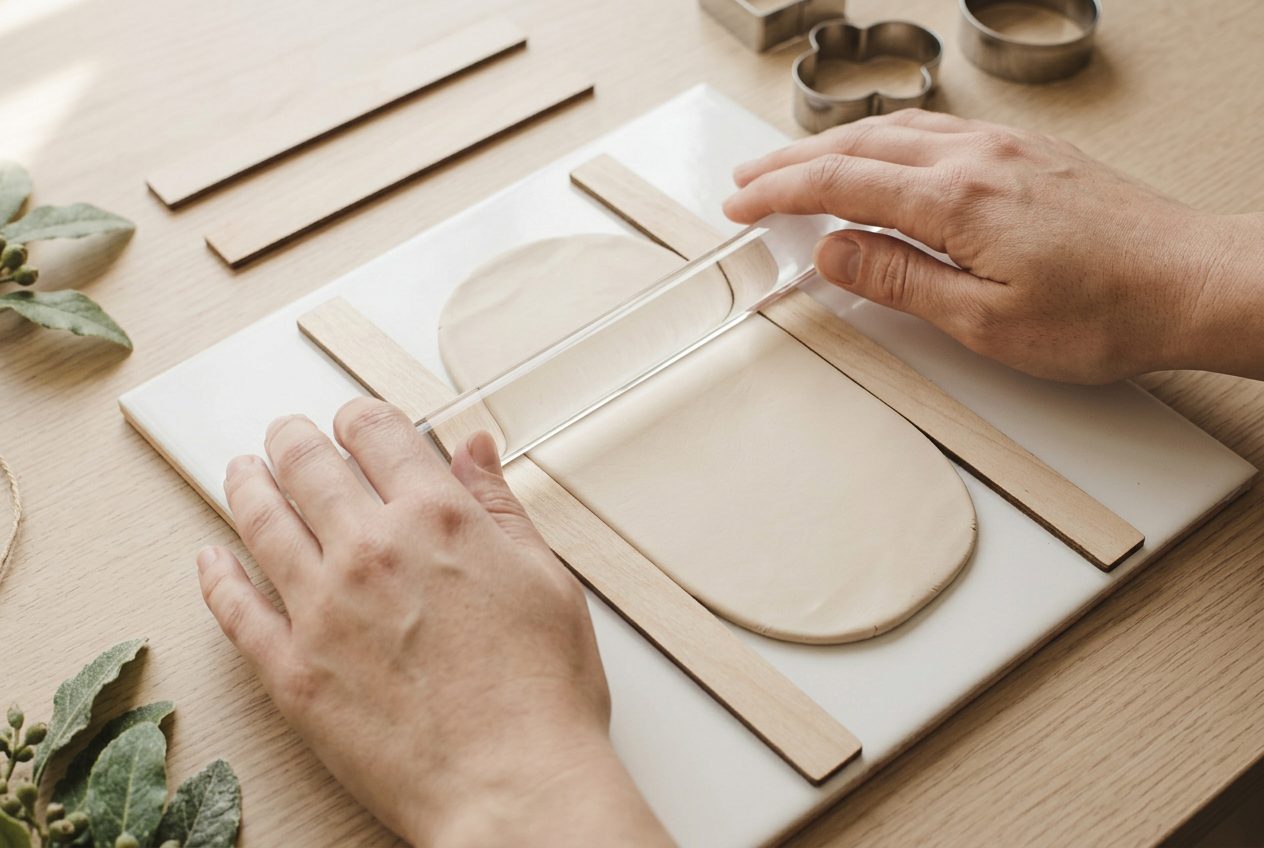
Four millimetres is the right compromise for something that hangs. Thinner warps more and cracks at the hole; thicker gets heavy enough to bend a thin branch.
Condition properly first. A tree decoration spends eleven months in a box being leaned on, and unconditioned clay breaks along the fold lines it always had.
Roll on the tile you will bake on, so the cut shapes never have to be lifted and distorted.
3Cut the shapes
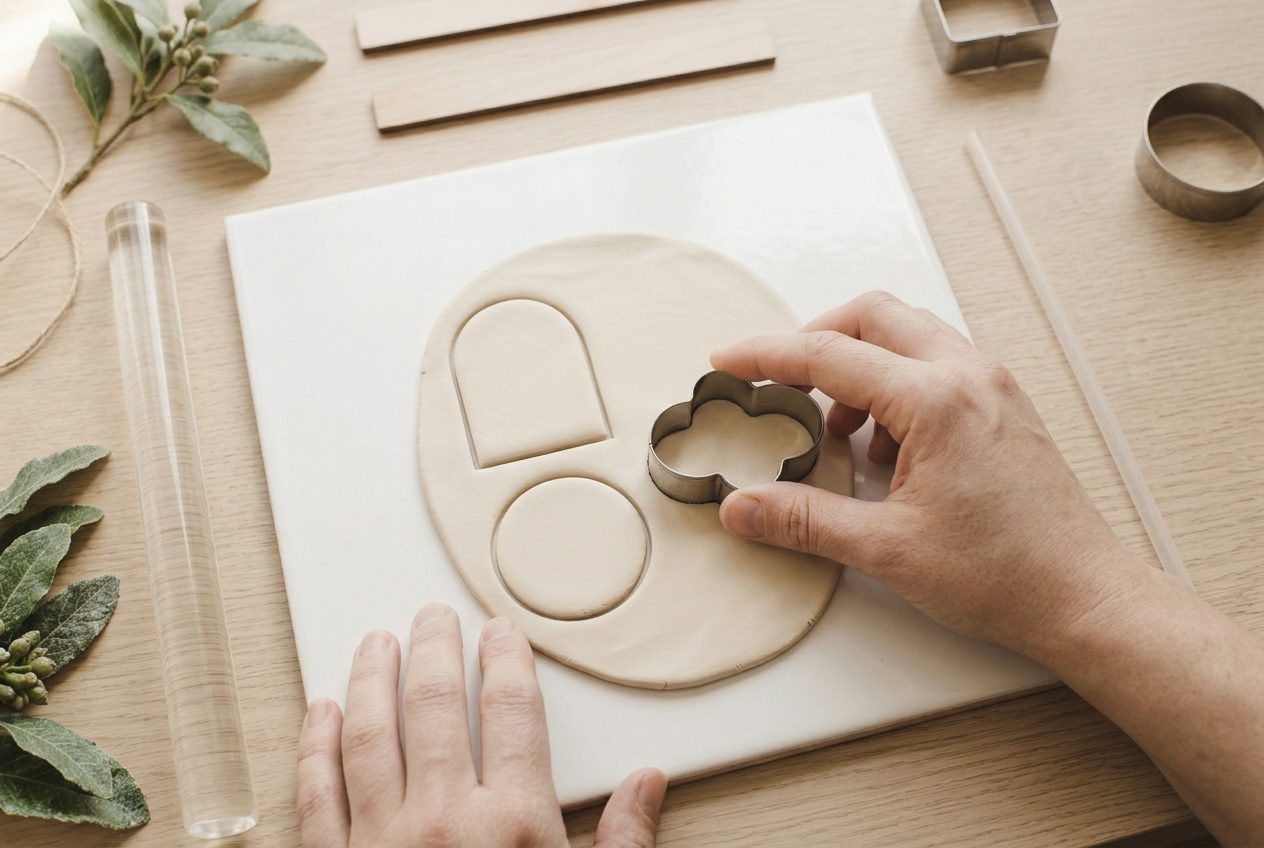
Press straight down and lift straight up without twisting. A twist bevels one side of every shape, and a set of six with bevelled edges looks like a set of six mistakes.
Chill the sheet for ten minutes first if the clay feels soft. Cold clay cuts cleanly and warm clay drags.
Peel the waste away and leave the shapes where they were cut. Lifting a soft shape stretches it out of round.
4Punch the hanging hole
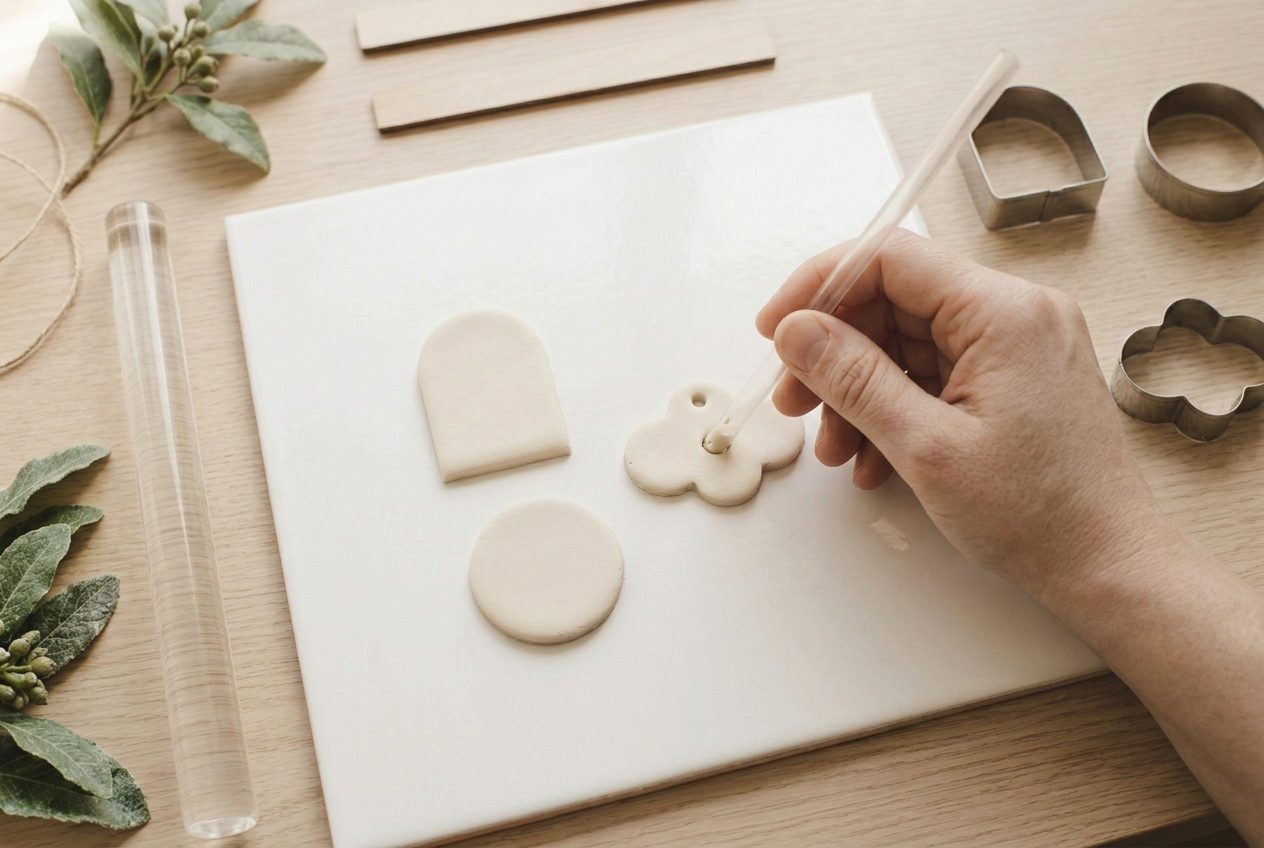
Five millimetres in from the edge, at the top, centred. Closer and the bridge of clay above the hole snaps when the ornament is lifted off a branch by the loop.
Twist the straw as it goes through so the plug comes out with it. Pushing a hole with a skewer raises a lip on the underside that has to be sanded off later.
Do it now. Drilling a baked ornament is possible but chips the face on the way through, and the chip shows.
5Press the texture in
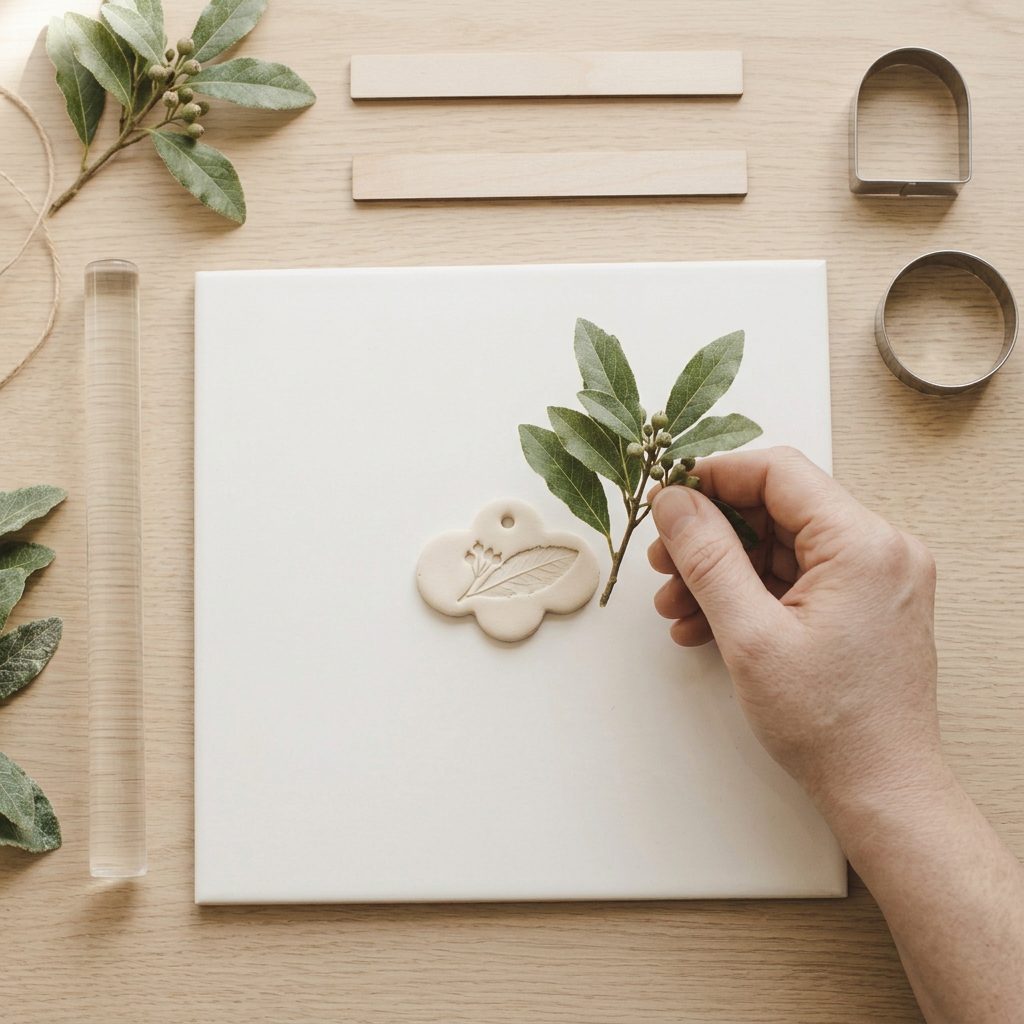
Press once, straight down, and lift straight up. Rocking the sprig doubles every leaf edge and the impression stops reading as a leaf.
Press deeply. A shallow impression looks fine in soft clay and almost disappears once the surface has baked and the light falls on it flatly.
Check the shape has not spread under the pressure. If the outline has gone soft, trim it back with the cutter before baking.
6Bake flat, then sand and thread
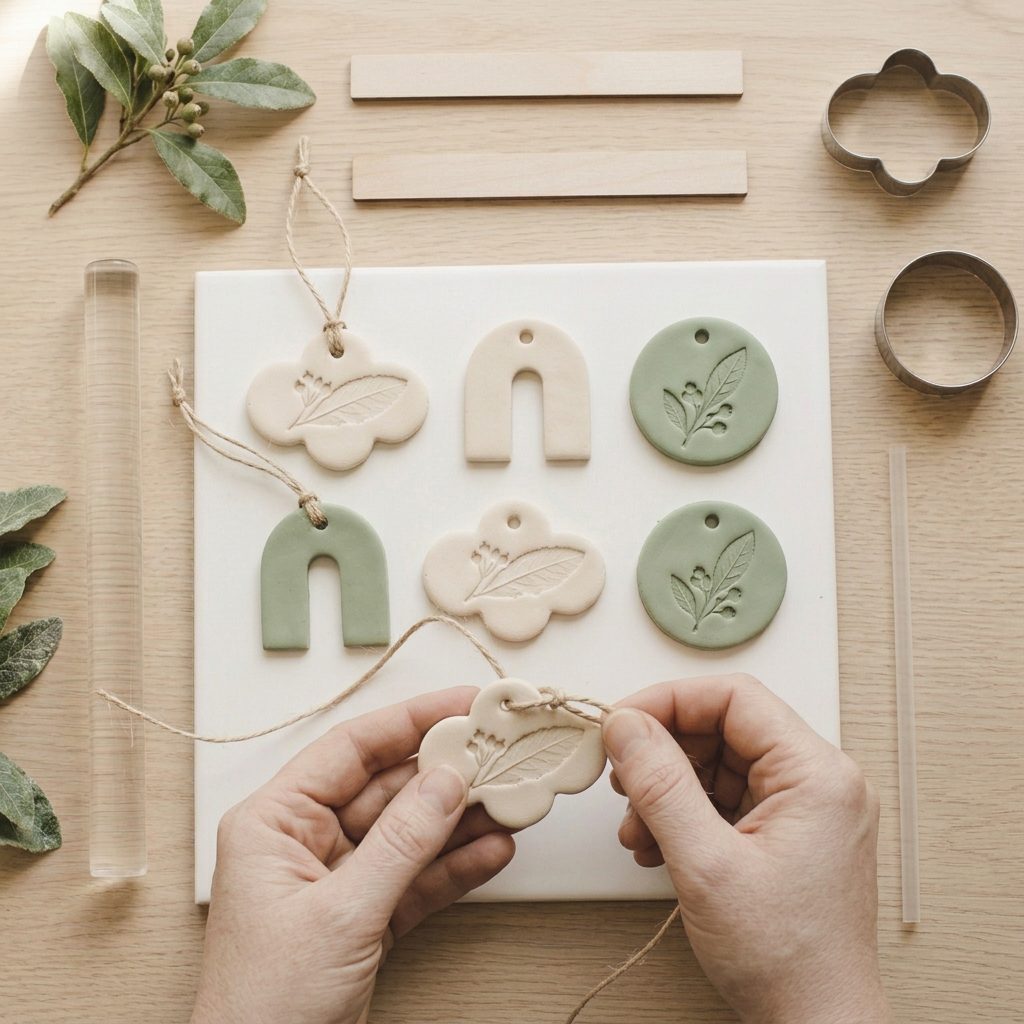
Bake at 130C for thirty minutes with parchment and a second tile laid on top, then let everything cool in the oven with the door shut.
Wet sand the cut edges and the inside of the hole with fine paper. The edge is what a hand touches every time the ornament comes out of its box.
Thread twine through and knot it into a loop long enough to clear the branch. The polymer clay hub covers baking in detail, and the finishing hub covers sanding and buffing baked clay.
If it goes wrong
| Problem | Likely cause | How to fix it |
|---|---|---|
| The ornaments curled up at the edges | They were baked loose on a tray, so the two faces cured and cooled unevenly | Bake between two tiles with parchment between. A curled piece cannot be flattened once it has cured. |
| The clay broke above the hanging hole | The hole was punched too close to the edge, leaving a thin bridge that snapped under the loop | Keep about 5mm of clay above the hole. A broken bridge can be glued but will fail again in the same place. |
| The leaf impression barely shows | It was pressed too lightly, so the detail was shallow before baking flattened its effect further | Press much harder on the next one, or rub thinned dark acrylic over the baked face and wipe it back to pick out the pattern. |
| The shapes came out slightly different sizes | Soft shapes were lifted off the tile and stretched before baking | Peel the waste clay away instead and leave every shape untouched until it is baked. |
Why do flat polymer clay pieces warp in the oven?
Because the two faces of a thin piece cure and cool at slightly different rates.
The underside sits against a warm tile and cures first while the upper face is still soft. As the piece cools, the two faces contract by marginally different amounts and the edges lift.
Baking between two tiles removes the difference: both faces are against a flat warm surface throughout, and the piece has nowhere to curl to. Parchment stops the upper tile marking the clay.
Uneven thickness makes it much worse. A shape rolled thicker at one end bends towards the thin end, and no amount of weight fully corrects that. Roll between guide strips.
Are polymer clay ornaments better than salt dough?
For anything you want to keep, yes.
Baked polymer clay is a cured plastic. It is unaffected by damp, so a box in a cold loft does nothing to it, and it does not crumble at the edges the way air dry clay does when it is knocked.
Salt dough is cheaper, involves nothing you do not already own, and is much better with children. It is also hygroscopic: in a damp store it slowly softens, and unsealed pieces can go mouldy or attract mice.
Air dry clay sits between the two. It survives storage well enough if it is sealed, but a chip out of an edge cannot be repaired invisibly.
The honest answer is that salt dough is for the ornaments a child makes each December, and polymer clay is for the ones you expect to hang on the tree in twenty years. The christmas hub covers both.
Frequently asked questions
Are polymer clay ornaments better than salt dough?
For keeping, yes. Cured polymer clay ignores damp storage, while salt dough slowly softens in a cold loft and unsealed pieces can go mouldy.
Why do flat clay pieces warp when baked?
The two faces cure and cool at slightly different rates and the edges lift. Baking between two tiles keeps both faces flat throughout.
How thick should a clay ornament be?
About 4mm. Thinner pieces warp more and crack around the hole; thicker ones are heavy enough to bend a thin branch on the tree.
How do you make a hanging hole in clay?
Push a plain drinking straw through before baking, twisting it so the plug of clay lifts out. Drilling after baking chips the face.