

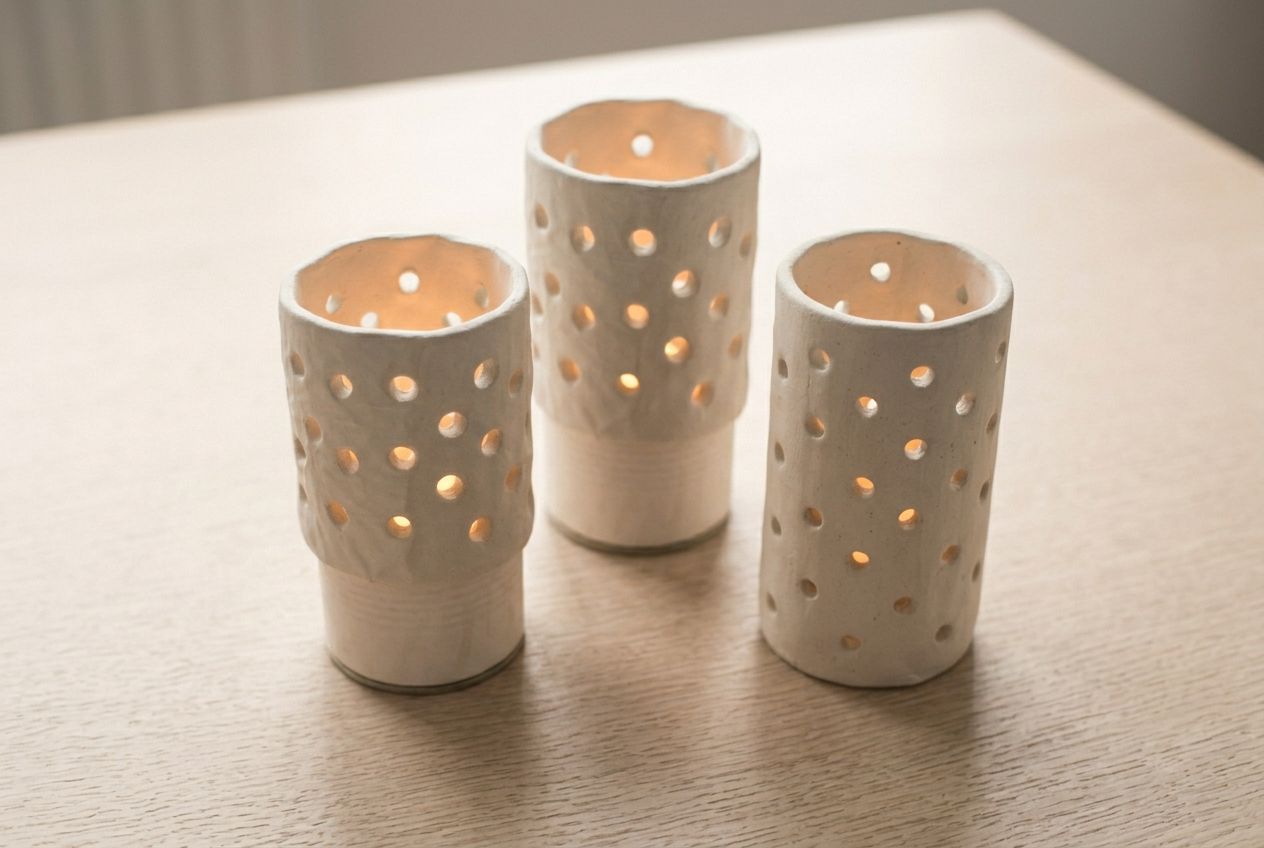
Clay Halloween luminaries are a wrapped cylinder pierced while the clay is still soft, dried standing on the tin that formed it, and lit with a battery tealight. Punching the holes soft rather than drilling them dry is what stops the wall splitting.
Clay Halloween luminaries are the best-looking thing on the whole seasonal list and the one most likely to crack in half.
The failure is always the same and it is always the same step. Someone builds the cylinder, lets it dry, and then drills the holes into a wall that has no give left in it.
The halloween hub has the simpler projects. This one is worth attempting second rather than first, because it involves a join and a wall that has to stay round.
Materials
- 500g air dry clay
- A little water
- Matt acrylic paint in charcoal, optional
- Matt acrylic sealer
- A battery tealight
Tools
- Wooden rolling pin
- Two 6mm flat wooden guide strips
- A straight-sided tin about 7cm across, wrapped in baking paper
- Plastic drinking straw
- Small craft knife
- Damp sponge
Fifty-five minutes of work spread over three days of drying.
How do you make clay Halloween luminaries that do not split?
Punch every hole while the clay is still soft enough to take a fingerprint, score and slip the seam properly, and leave the cylinder standing on its former for a full day before sliding it out.
1Set out what you need
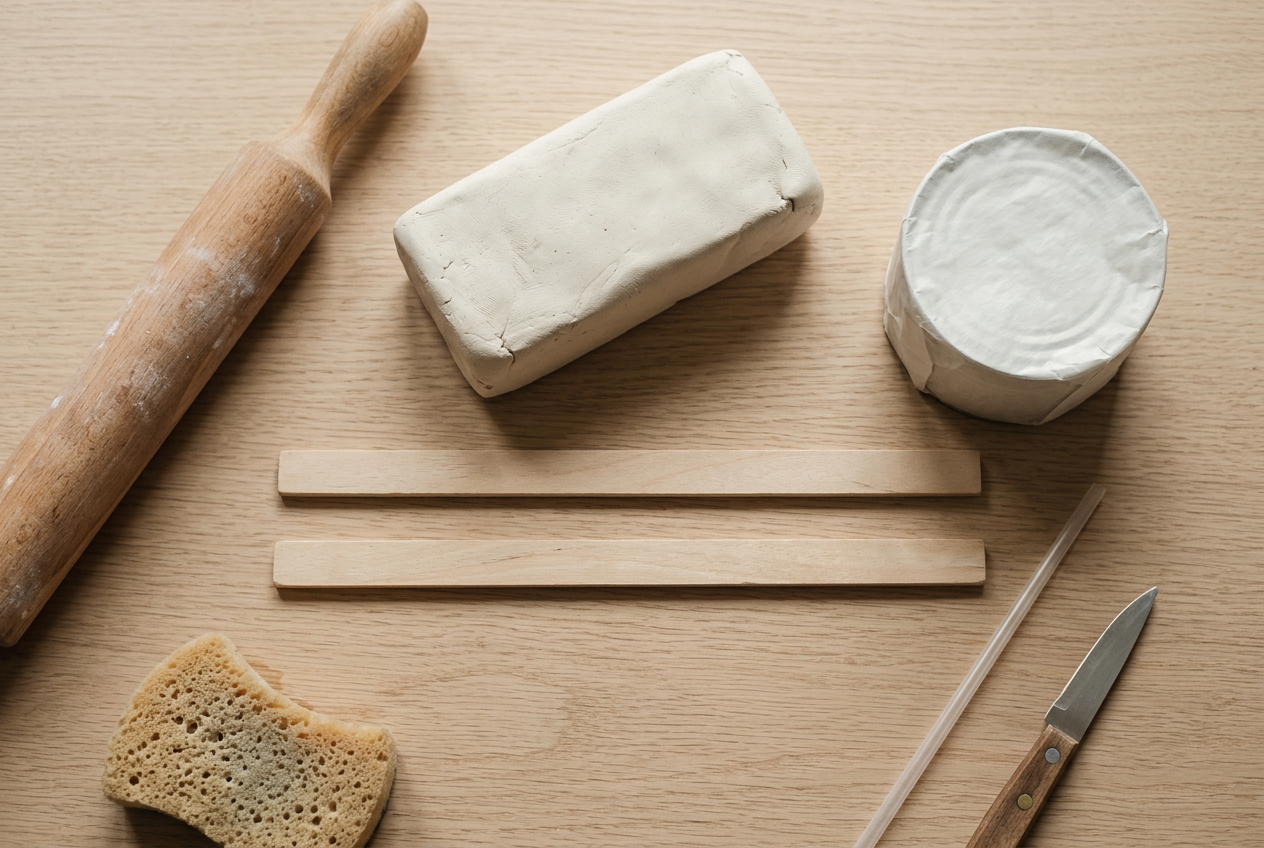
The former is the item that decides whether this works, and it has one requirement: straight sides.
A tapered tin, which is most tins, cannot be pulled out once the clay has stiffened around it. The clay shrinks onto the taper and locks.
Wrap it in baking paper rather than oiling it. Paper releases cleanly and does not leave a mark that resists the sealer later.
2Roll a 6mm sheet and cut the wrap

Roll between the guide strips so the sheet is a true 6mm everywhere. Thickness is doing two jobs here: it carries the strength between the holes, and it decides how much light comes through the clay itself.
Measure the length by wrapping a strip of paper round the tin and marking it, then add 1cm for the overlap. Guessing produces either a gap or a thick lumpy seam.
Cut the top and bottom edges straight and parallel. A luminary that rocks is a luminary that eventually tips over.
3Wrap the sheet around the former
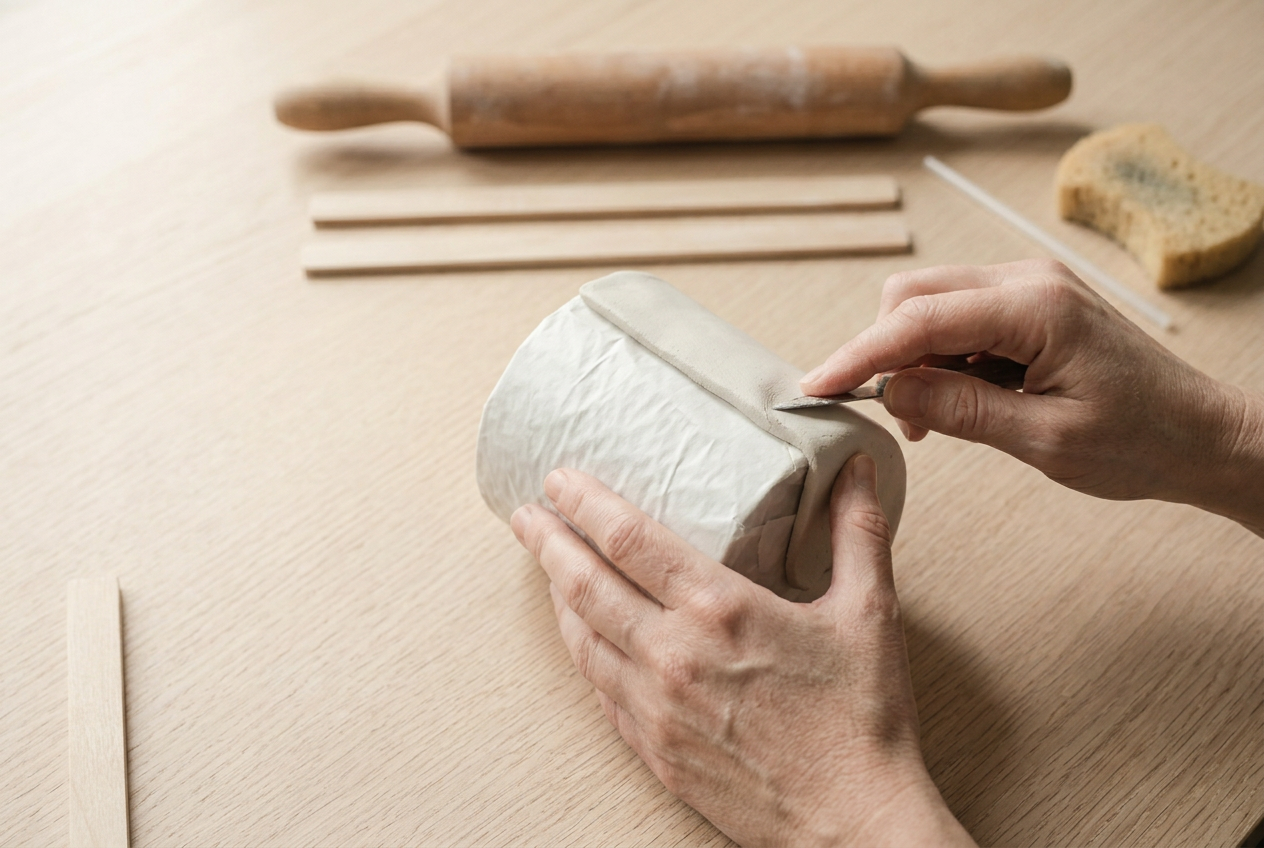
Wrap the clay around the tin and bring the overlap together.
Score both faces of the overlap with the knife tip and wet them before pressing. A seam that is only squeezed together looks joined and is not: the clay shrinks as it dries and pulls the unbonded faces apart, usually on the second night.
Smooth the seam with a damp sponge until it disappears. It should not be findable by eye once the piece is dry.
4Punch the holes while the clay is soft
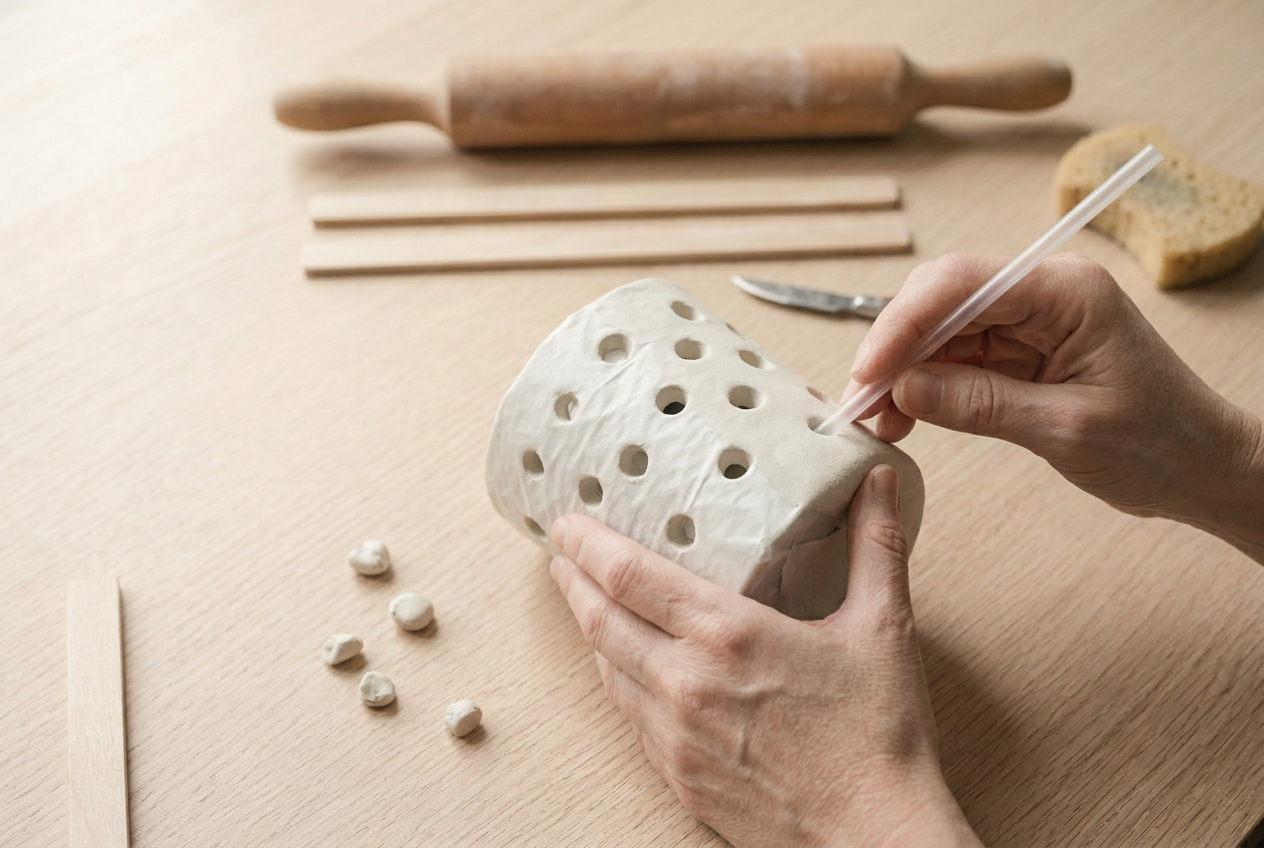
This is the step the whole article exists for. Punch now, while the clay still takes a fingerprint.
Push the straw halfway in from the outside, then finish the hole from the inside where you can reach, and lift each plug out. Done from one side only, the far edge tears outward and reads as ragged when lit.
Leave at least 1.5cm of solid wall between holes. Around thirty holes on a 7cm cylinder is the number where it reads as a pattern and still holds together.
A hole drilled into dry clay splits the wall between it and its neighbour almost every time, which is why this cannot be left until later.
5Dry standing on the former
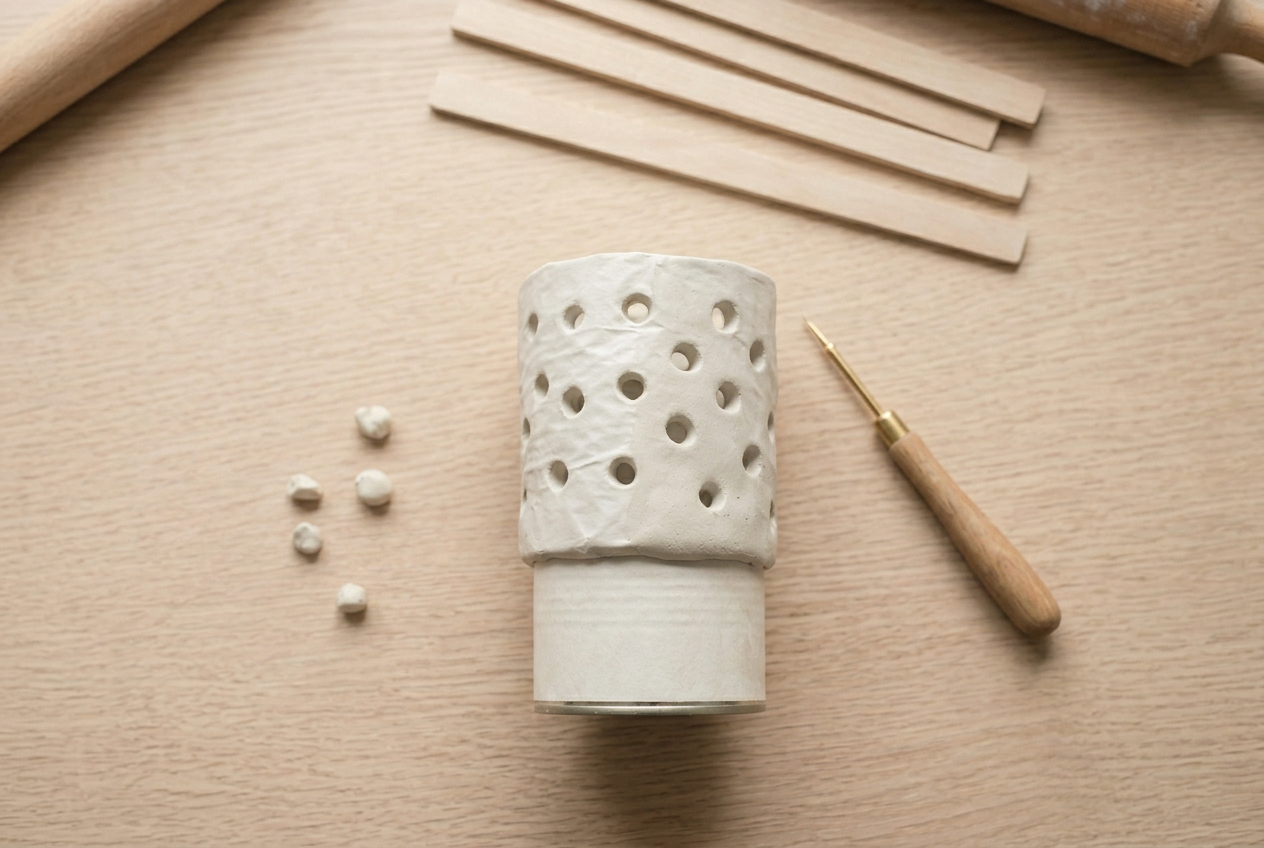
Leave it on the tin for a full day without touching it.
The former is not just a shaping aid at this stage, it is the only thing holding the cylinder round while the clay is still soft enough to relax. Slide it out after a few hours and the shape settles into an oval that cannot be corrected.
After a day, twist the tin gently and draw it out, then stand the cylinder upright for two more days. Turn it a quarter turn each day so every face gets the same air.
Why air dry clay cracks covers what to do if the drying goes wrong at this stage.
6Seal it and light it with a battery tealight

Sand the rim smooth, then seal inside and out. Sealing the inside matters as much as the outside, because that is the face that never gets looked at and the first to draw damp.
Leave it pale and the wall glows warmly all over. Paint the outside charcoal and the holes become sharp points of light against a dark shape instead. Both work; painting the inside kills the effect entirely.
Use a battery tealight. A 6mm wall over a real flame gets genuinely hot, and heat that uneven can crack a sealed surface. Sealing air dry clay covers which sealers hold up.
If it goes wrong
| Problem | Likely cause | How to fix it |
|---|---|---|
| The wall split between two holes | The holes were made after the clay had started to stiffen, or they were punched too close together | Punch while the clay still takes a fingerprint, and leave at least 1.5cm of solid wall between holes. A split can be filled with clay paste and resanded. |
| The seam opened as it dried | The overlap was pressed together without scoring and wetting both faces first | Always score both surfaces and add slip. An open seam can be filled with a paste of the same clay, but it will always show slightly. |
| The cylinder dried into an oval | The tin was removed too early, so there was nothing holding the round shape while the clay was still soft | Leave it on the former for a full day. An oval cylinder cannot be corrected once dry, so this is prevention rather than repair. |
| The holes look rough from the inside | The straw was pushed through from the outside only, so the inner edge tore outward | Push halfway from the outside, then finish from the inside where you can reach. Smooth the inner edges with a damp sponge before drying. |
Does the hole pattern actually matter?
More than the shape of the luminary does, because the pattern is the only thing anyone sees once it is lit.
Scattered beats regular. An even grid reads as a colander; holes clustered more densely near the top and thinning towards the base read as sparks rising, and cost nothing extra to do.
Vary the size if you have two straw diameters. A few larger holes among the small ones give the light somewhere to pool and stop the whole thing looking mechanical.
Keep the bottom 2cm solid. That band is what stops the light spilling flat across the table and washing out the pattern, and it is also the strongest part of the wall. The top 10 halloween clay ideas roundup shows them alongside the rest of the set.
Frequently asked questions
Can a real candle go in a clay luminary?
Not safely in one this thin. A 6mm air dry clay wall reaches an uncomfortable temperature over a real flame and the heat can crack a sealed surface. Battery tealights give the same effect with none of that.
How many holes should a clay luminary have?
Enough to read as a pattern and not so many that the wall stops being a wall. Around thirty on a 7cm cylinder is right, with 1.5cm of solid clay between each one.
What size former works best?
A straight-sided tin about 7cm across and 9cm tall. Wider than that and the wall wants to sag before it stiffens, narrower and there is not enough room for the light to spread inside.
Should luminaries be painted?
They work either way. Left pale, the clay glows warmly through the wall itself; painted charcoal on the outside only, the holes read as sharp points of light instead. Never paint the inside, which kills the glow.



