Conditioning polymer clay means slicing a block thin, warming it, then rolling and folding it repeatedly until it bends without cracking. Skipping it is the single most common reason a baked piece snaps, because unconditioned clay never fully binds together in the oven.
Conditioning polymer clay is the step that decides whether the thing you make survives being dropped, and it is invisible. A badly conditioned piece comes out of the oven looking exactly like a well conditioned one. It just breaks.
Straight from the packet, polymer clay is compressed and unevenly soft, with the plasticiser sitting where the factory left it rather than spread through the block. Baking that gives you particles held loosely together instead of a single fused material.
Working it out and folding it back redistributes everything, and there is a simple test that tells you when it is done. The techniques hub covers what to do with the clay once it is ready.
Materials
- A block of polymer clay
- A little cornflour, if the clay is sticky
Tools
- Clear acrylic roller, or a smooth glass jar
- Long tissue blade
- A white ceramic tile to work on
- A pasta machine, optional but fast
- Baby wipes, for cleaning between colours
Five to ten minutes by hand for a fresh block. Longer for anything that has been in a drawer a year.
When is conditioning polymer clay finished?
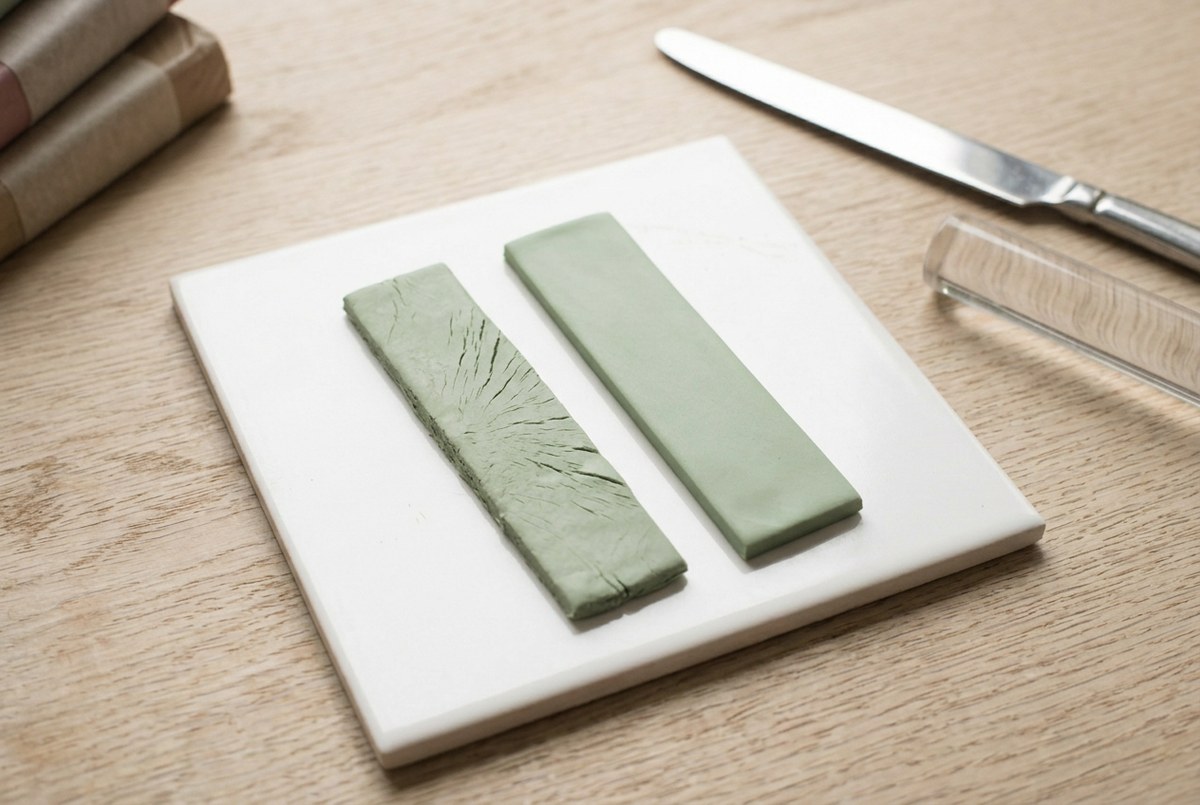
Fold a strip back on itself. If the fold cracks along its edge, keep working. If it bends smoothly and closes without a crack, it is ready.
1Set out what you need
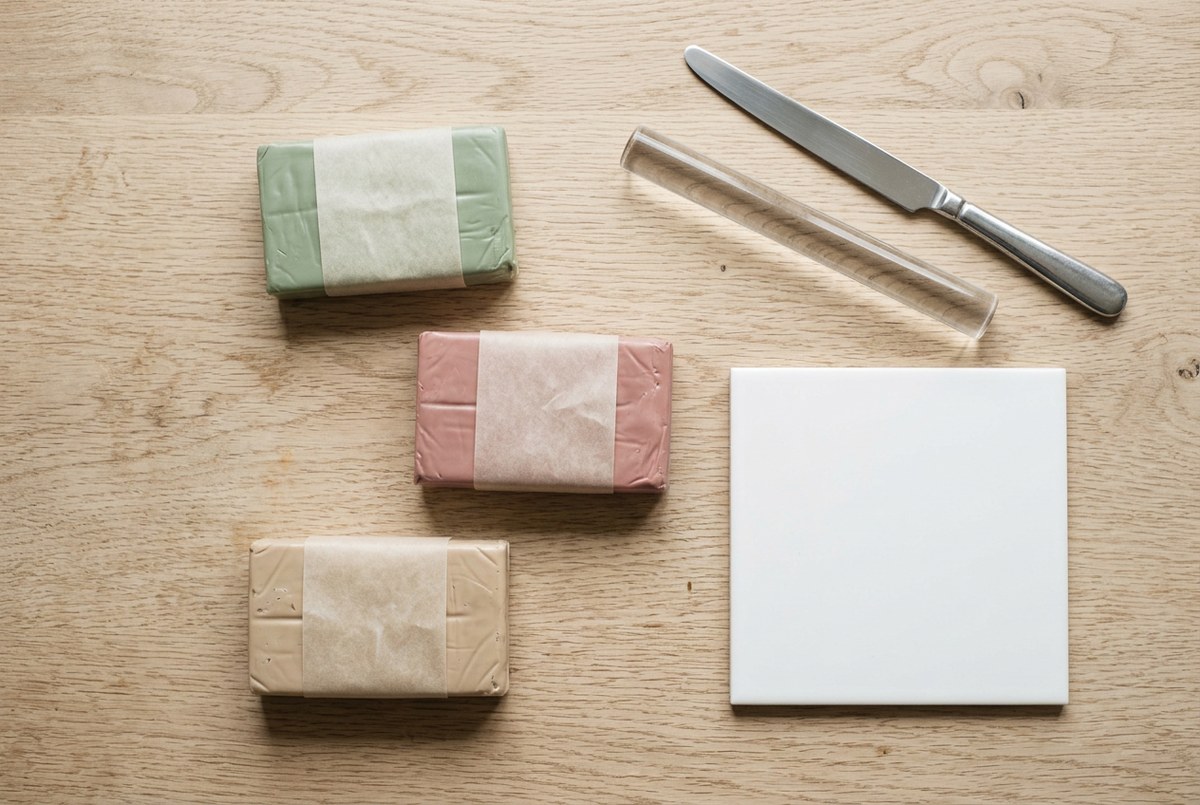
Work on a ceramic tile rather than straight on the table. Clay lifts off glazed ceramic cleanly, the tile stays cool under warm palms, and when you are finished the whole tile goes into the oven with the pieces still sitting on it undisturbed.
A tissue blade is worth the small cost. It cuts a block cleanly where a kitchen knife drags and compresses.
2Slice the block thin
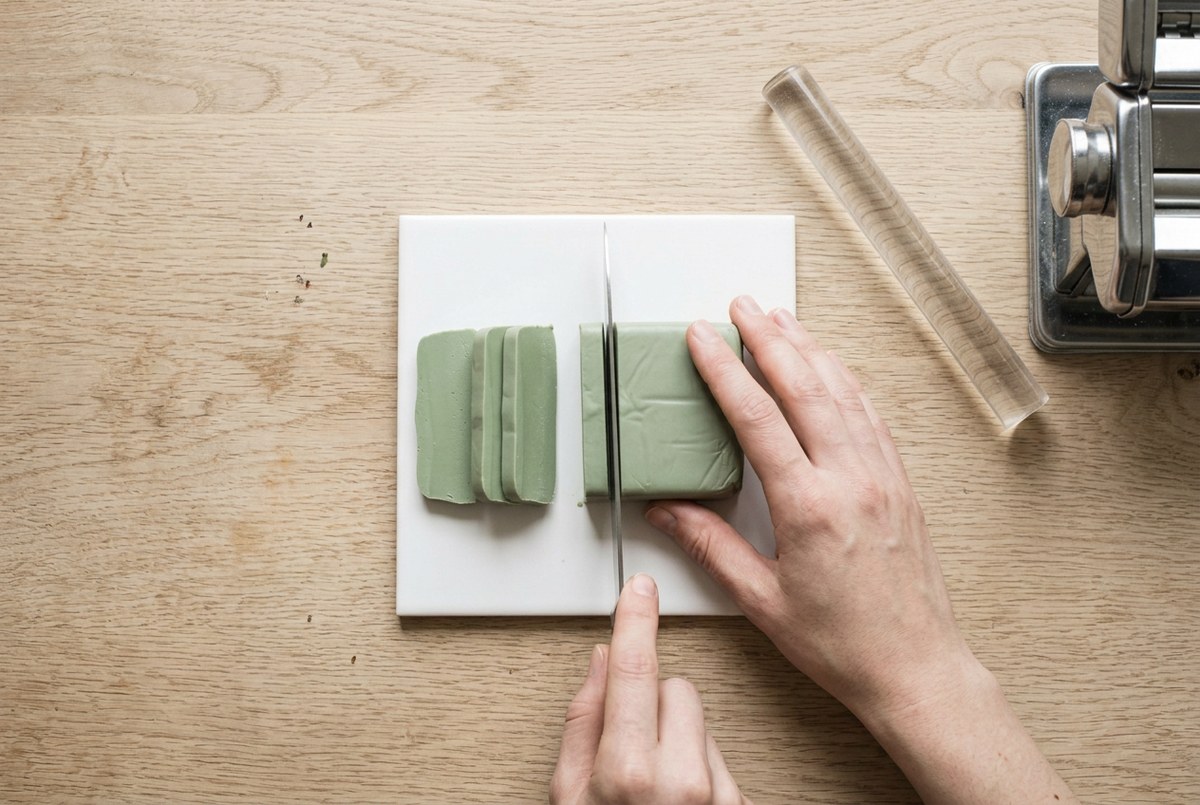
Cut the block into slices about 5mm thick before doing anything else.
This is the shortcut nobody uses. A whole block has to warm from the outside in, and the middle stays stiff long after the outside has gone soft, which is why fighting an intact block feels so unrewarding. Thin slices reach working temperature in a minute or two.
Press straight down with the blade rather than sawing. Sawing smears the cut face and drags the colour.
3Warm and press them flat
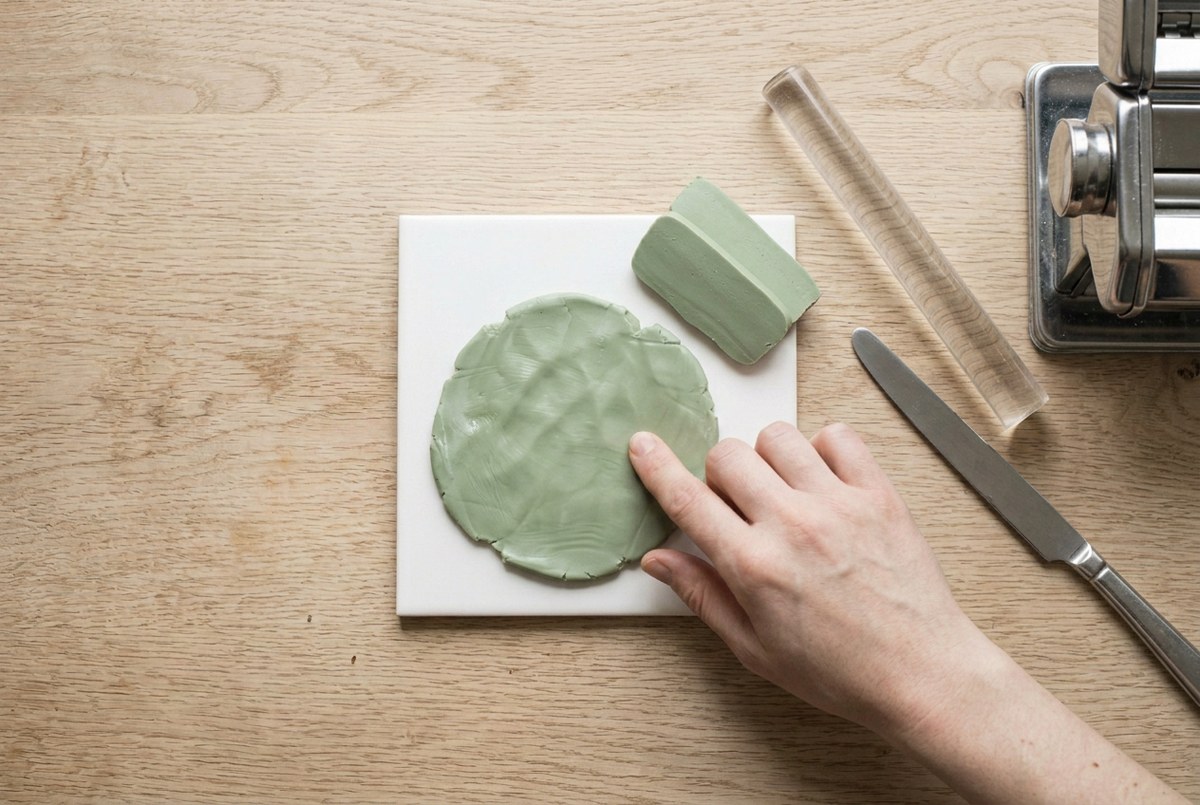
Press each slice out under the heel of your palm until it spreads to roughly 8cm across.
Warmth and pressure are the only two things that soften polymer clay. Water does nothing, and neither does time on its own. This is why the clay gets easier as you go: you are heating it while you work it.
If a slice is fighting you, put it in a pocket for five minutes and come back to it. Body heat is exactly the right temperature and there is no risk of starting a partial cure, which a radiator or a hairdryer can do.
4Roll, fold, and repeat
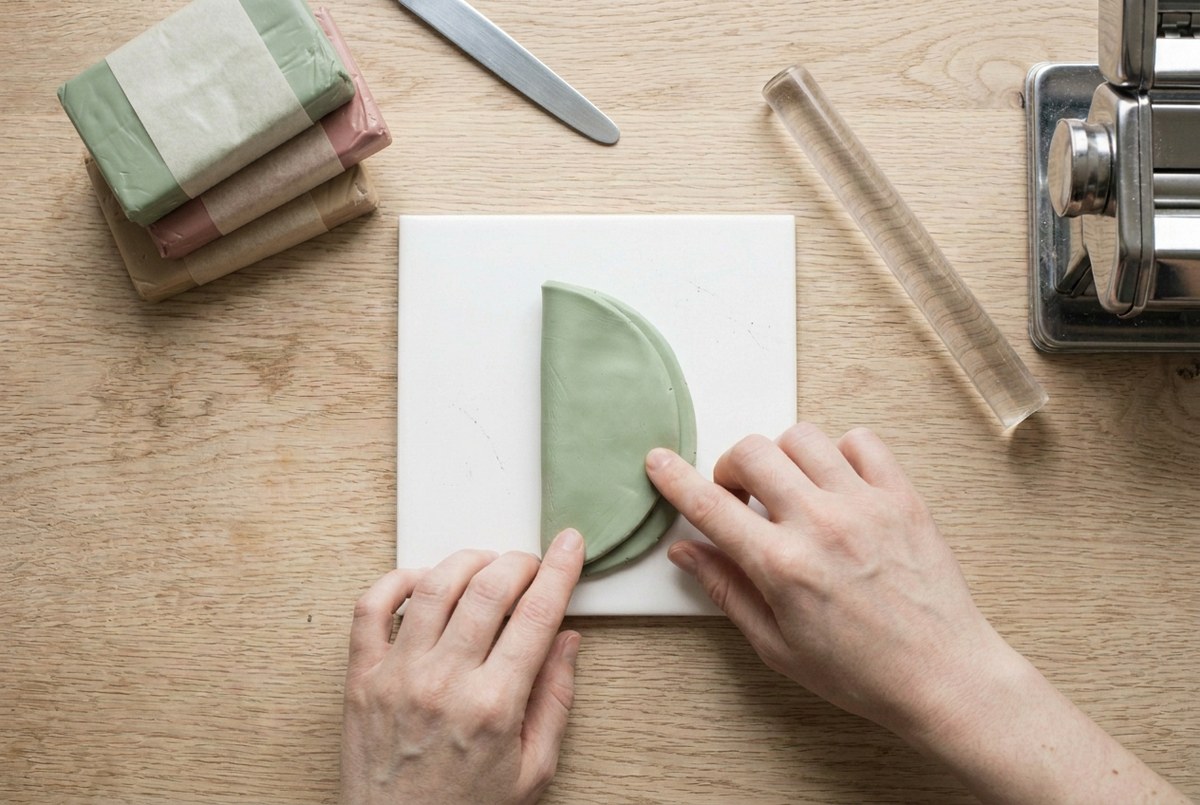
Roll the clay out flat, fold it over on itself, turn it, and roll again. Twenty passes is normal for a fresh block. Forty is not unusual for an older one.
Fold the same way every single time, and feed the folded edge in first if you are using a pasta machine. Alternating the direction traps a pocket of air between the layers, and that pocket becomes a bubble you will be chasing across the sheet for the rest of the session.
The clay tells you how it is going. Early passes tear at the edges. Later ones stretch instead.
5Run the bend test
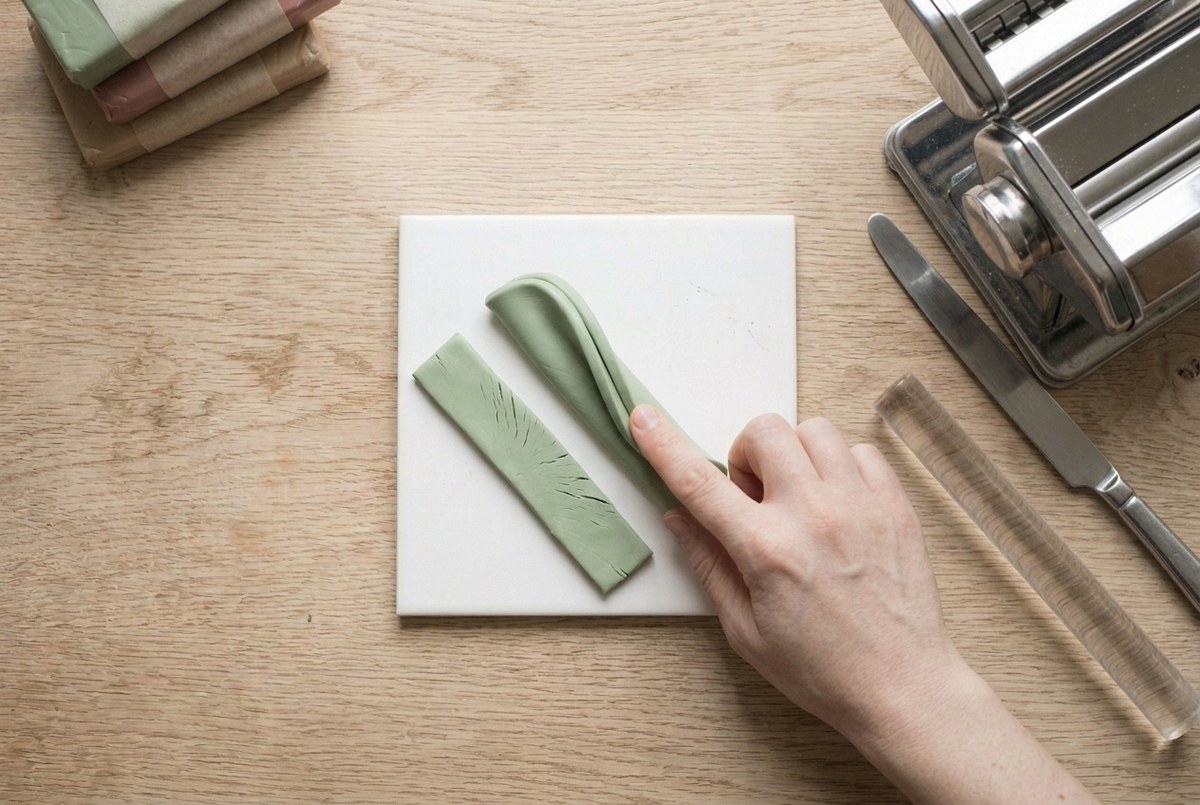
Take a strip, bend it back on itself, and look at the outer edge of the fold.
Splits and fine cracks along that edge mean the clay is not there yet. Keep going. A fold that closes smooth and stays smooth means it is conditioned, and no amount of extra work improves it further.
This test is the whole reason to bother, because feel is unreliable. Soft clay and conditioned clay are two different things, and some brands come out of the packet soft enough to shape while being nowhere near ready to bake.
6Roll an even sheet
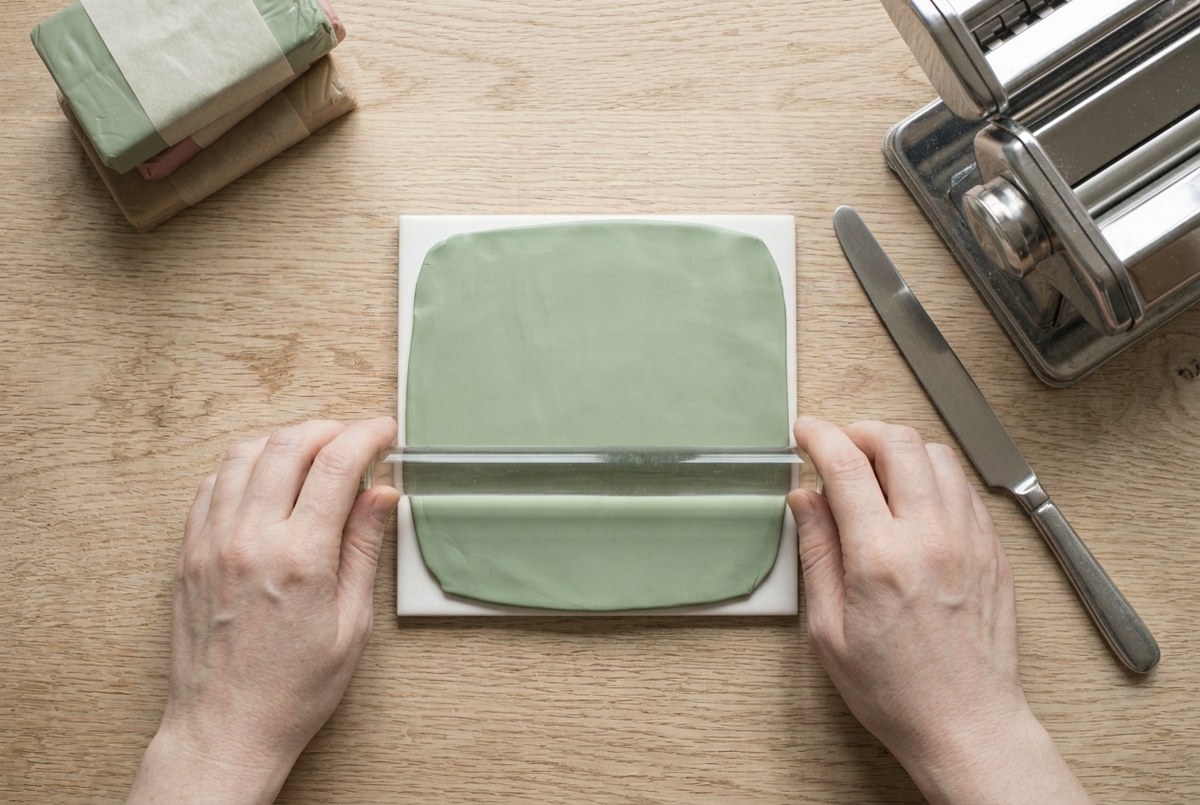
Roll out to an even thickness, working from the middle towards each edge.
If a bubble shows up, pierce it with a pin at a shallow angle and roll it closed rather than pressing it flat, which just moves the air somewhere else in the sheet.
Rest the sheet on the cool tile for a few minutes before cutting anything. Warm clay stretches as you lift it and a shape cut from warm clay distorts on its way to the baking tray.
7Cut and bake
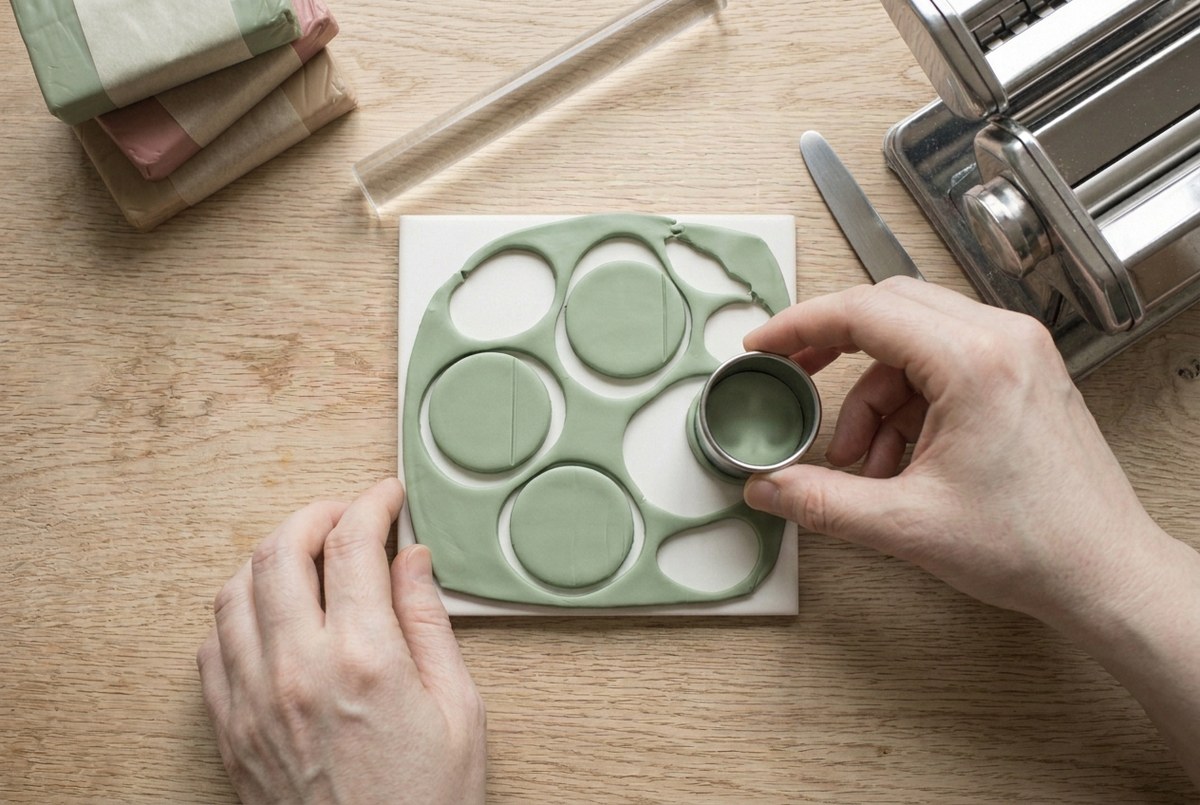
Cut on the tile and bake on the same tile. Moving a raw piece is where fingerprints and distortion come from.
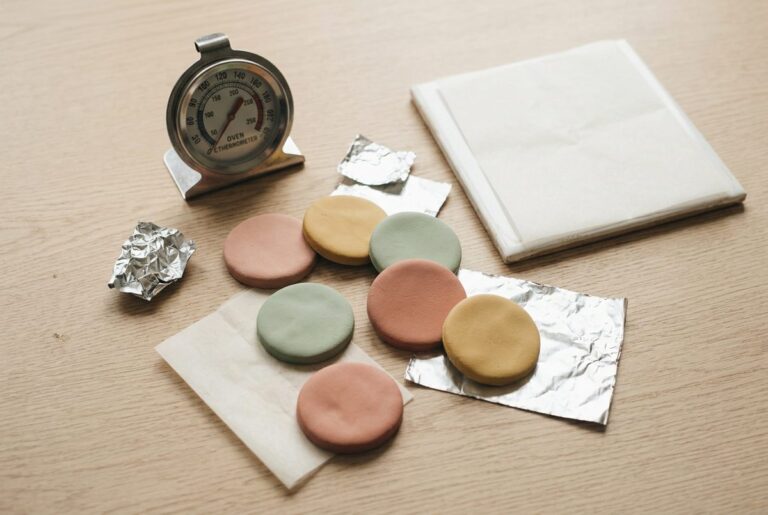
Bake at the temperature on the packet, for longer than feels necessary. Under-baking produces a piece that snaps easily, which looks identical to the under-conditioning failure and gets blamed on it constantly. An oven thermometer settles the question; domestic ovens routinely run twenty degrees under their dial.
Once cooled, these are ready to drill, sand or string. The clay jewellery hub covers turning them into finished pieces.
Two strips below, one properly conditioned and one worked for about a minute.
If it goes wrong
| Problem | Likely cause | How to fix it |
|---|---|---|
| The clay crumbles instead of softening | It is old and some of the plasticiser has migrated out, which happens to blocks stored warm or left open | Slice it very thin, warm it in a pocket for ten minutes, and work it in small pieces. A few drops of clay softener kneaded in will rescue most blocks; badly dried ones are past saving. |
| The baked piece snapped easily | The clay was shaped before it was fully conditioned, so the particles never bound properly during baking | There is no repair for it. Condition until the bend test passes cleanly before shaping anything, and check the oven temperature with a separate thermometer. |
| Bubbles appeared in the sheet | Air was folded into the clay by turning the fold a different way each pass | Always feed the folded edge into the roller or the pasta machine first, and fold in the same direction every time. Pierce any bubble already in a sheet with a pin and roll it flat. |
| The clay is sticky and hard to handle | It has been over-worked and warmed, which is common with softer brands in a warm room | Rest it on a cool ceramic tile for ten minutes, or dust it very lightly with cornflour. Leaching on plain paper for an hour draws out excess plasticiser in stubborn cases. |
Can you condition polymer clay without a pasta machine?
Easily. A pasta machine is faster, not better, and a clear acrylic roller does the same job on a tile.
The technique is the same either way: roll out, fold, roll again. By hand you are relying more on warmth, so the thin-slice step matters more. Slicing a block into 5mm pieces first turns a frustrating ten minutes into a comfortable five.
A smooth glass jar works if you have no roller at all. Avoid wooden rolling pins for polymer clay, because the grain leaves a texture in the surface and the wood holds pigment from every colour you have ever rolled with it.
Why does polymer clay break after baking?
Three causes, in rough order of frequency.
It was not conditioned, so the particles never bound into one material. It was baked too cool or too briefly, which does the same thing by a different route. Or the piece is simply too thin for what it is being asked to do; anything under about 3mm is fragile no matter how well you treated it.
The first two are indistinguishable after the fact, which is why the fix is to be strict about both. Condition until the bend test passes, and check the oven with a thermometer rather than trusting the dial. Our troubleshooting section goes through the other ways a baked piece can go wrong.
Frequently asked questions
What does conditioning polymer clay mean?
It means working the clay until its particles and plasticiser are evenly distributed and the block behaves as one consistent material. Straight from the packet the clay is compressed and unevenly soft, and shaping it in that state gives a piece that is brittle after baking.
How long does it take to condition polymer clay?
Five to ten minutes by hand for a fresh block, or a minute or two through a pasta machine. Older or firmer brands take considerably longer. The time is not the measure, though; the bend test is.
Do you have to condition polymer clay?
Yes, every time, including clay that already feels soft. Softness and conditioning are not the same thing. Unconditioned clay bakes into a piece that looks correct and breaks under very little force, and there is no way to fix it after the oven.
How do you soften hard polymer clay?
Slice it thin, warm it against your body or on a radiator for a few minutes, and work it in small pieces rather than fighting the whole block. If that fails, knead in a few drops of liquid clay softener. Never add water, which does nothing at all to polymer clay.
Save this for later